Property Listing's Document Tab
Once you have added all your content to your Properties page using the live editor and Block tab. You will notice that you can add further information using the Document tab located right next to it.
Most of the information you input in this section will appear in the Properties page as part of the preview of each land or will be used by your leads to help filter the properties, for example, filtering by location.
All the information listed in the documents tab will then be populated under All Properties in your WordPress Dashboard and you'll be able to sort and filter properties by attributes like size, status, and date it went on the market, etc. - This is useful for you if you have a lot of different properties listed.
As you can see in the below screenshot, we've sorted the properties by land size:

If you have already exited the editor, to get back to it, go to Properties > All Properties and click on the land you wish to edit.
Click on Document.

Status and Visibility
Here you can control the visibility of your post, this is useful if you are not quite ready to post the listing yet.
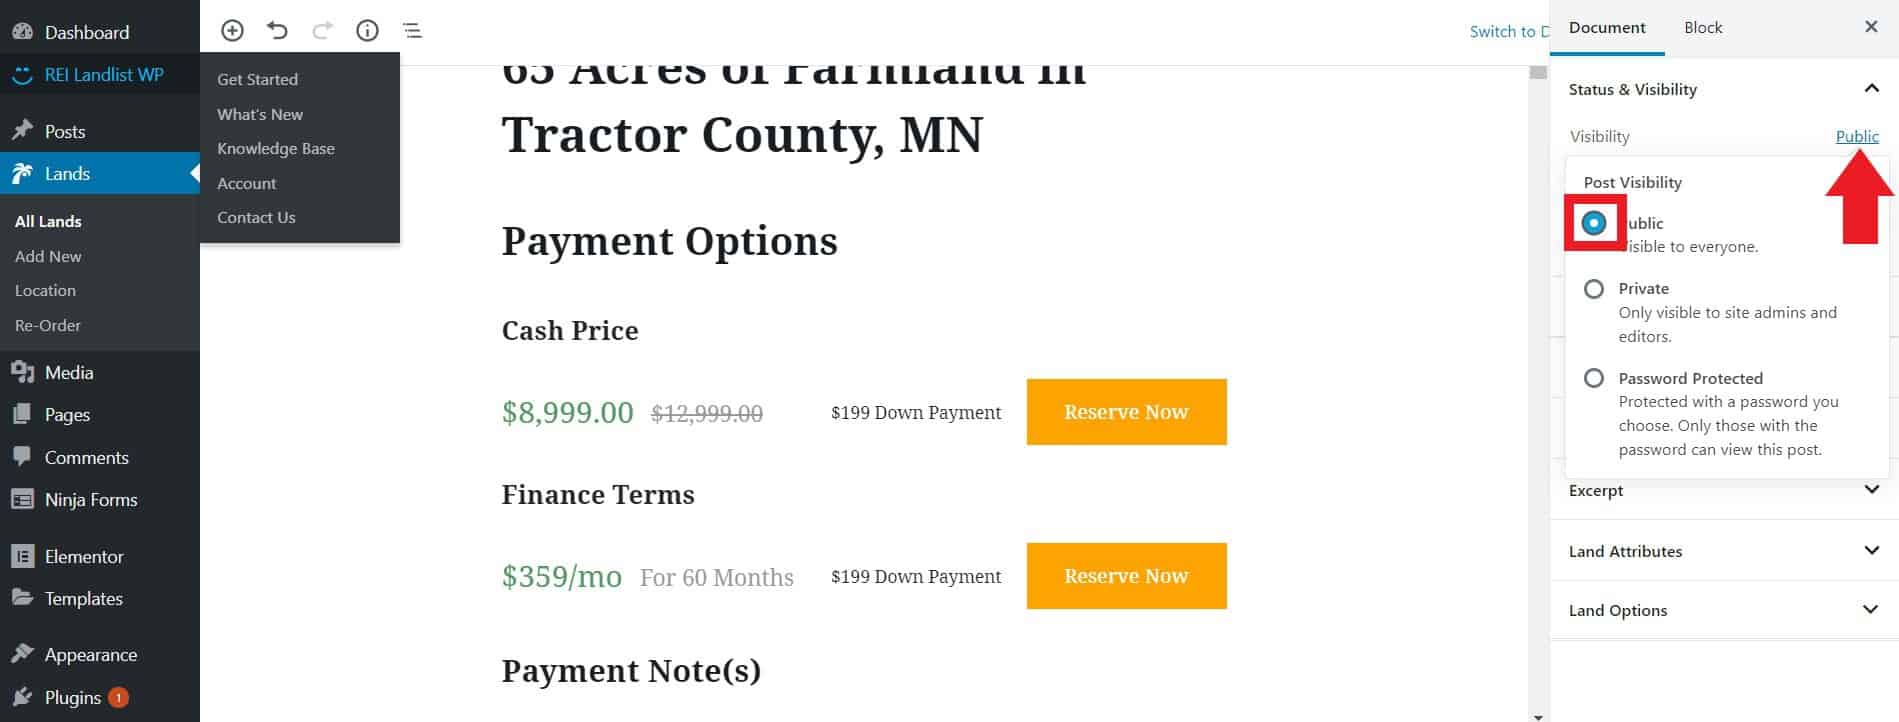
Visibility
Click on Public and you will be presented with a few options; either keep it set to Public, change to Private, or change to Password Protected, by clicking on the corresponding radial button. The latter is useful if you don't want the public to see the page yet other than a select few people.
Publish
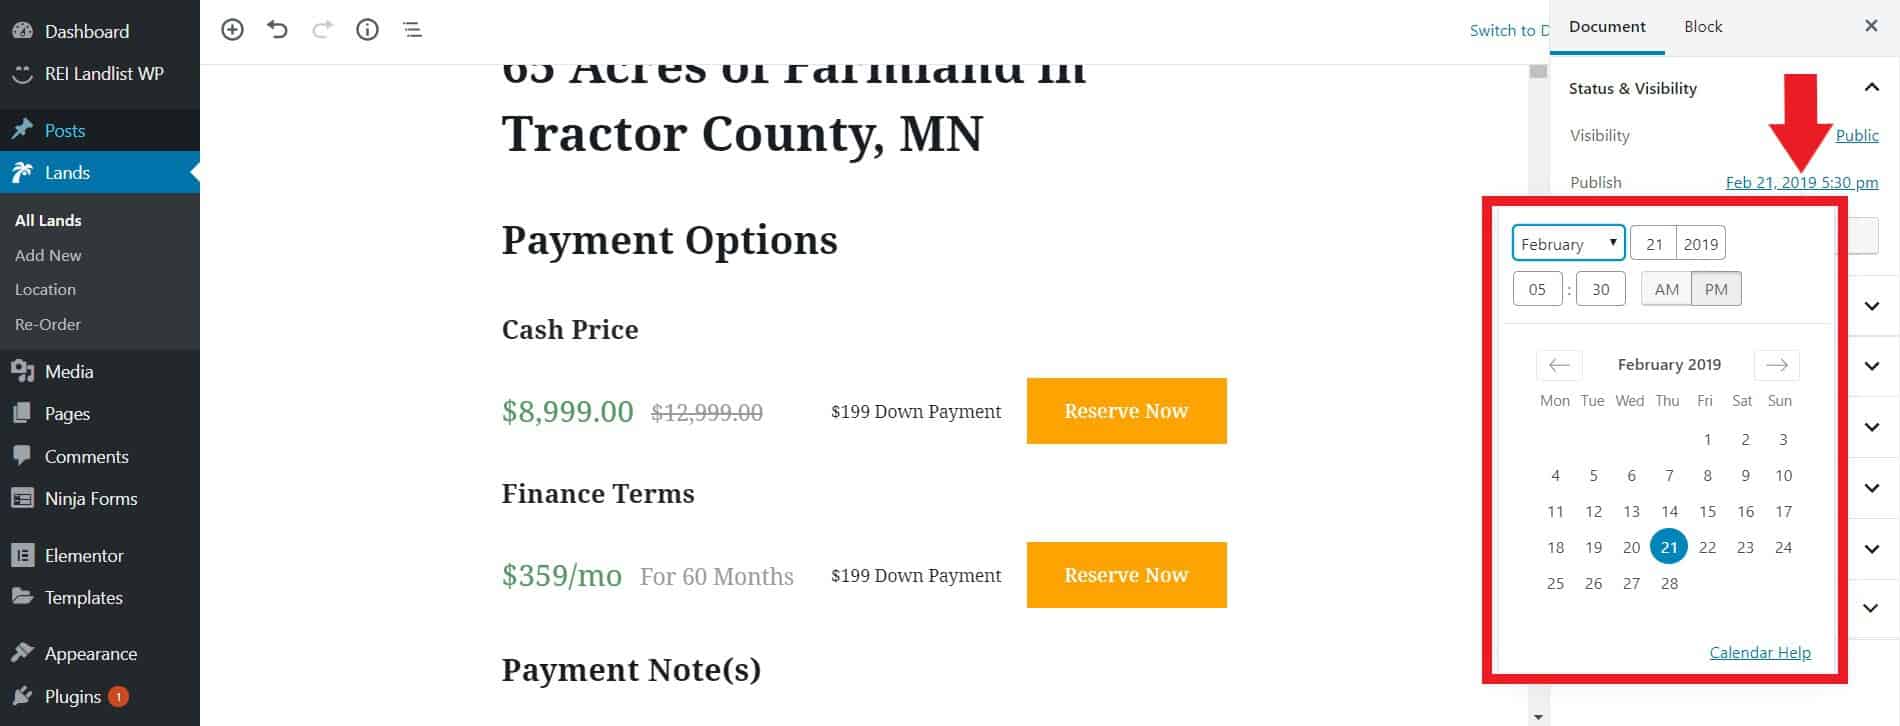
Here you can choose the exact date and time you want this Land to be published. Click on the hyperlink and a calendar will pop up so you can input the data.
Move to Trash
Click on this button to delete your listing.
Permalink
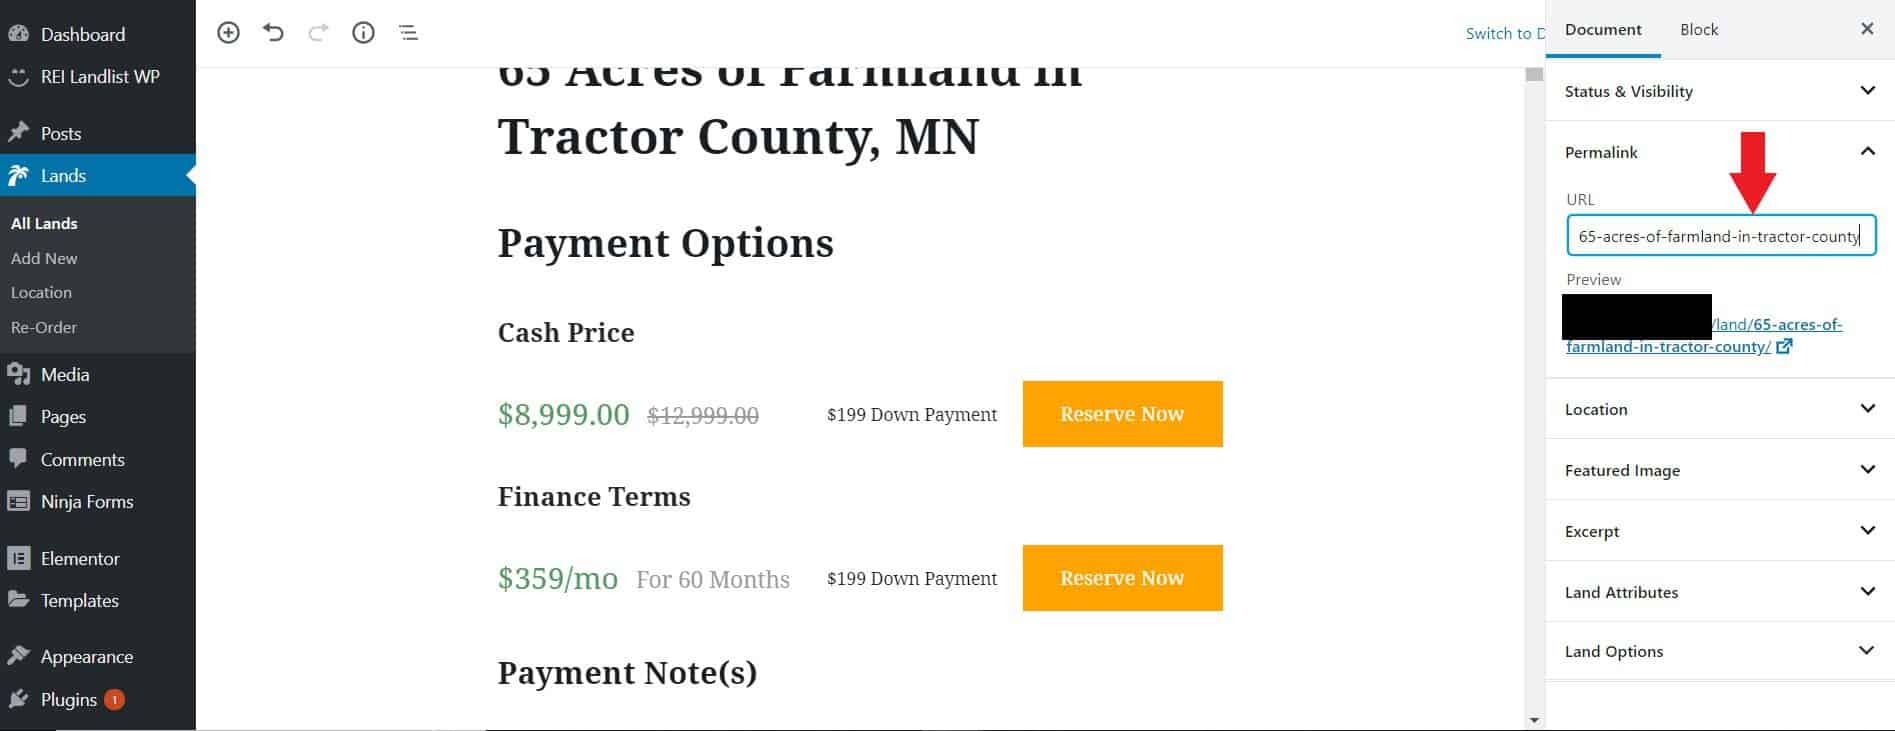
The permalink is the 'slug' or 'URL' of the particular land. By default, WordPress will automatically use your title as the slug, but if you wish to, you can modify it here to be more concise.
Location
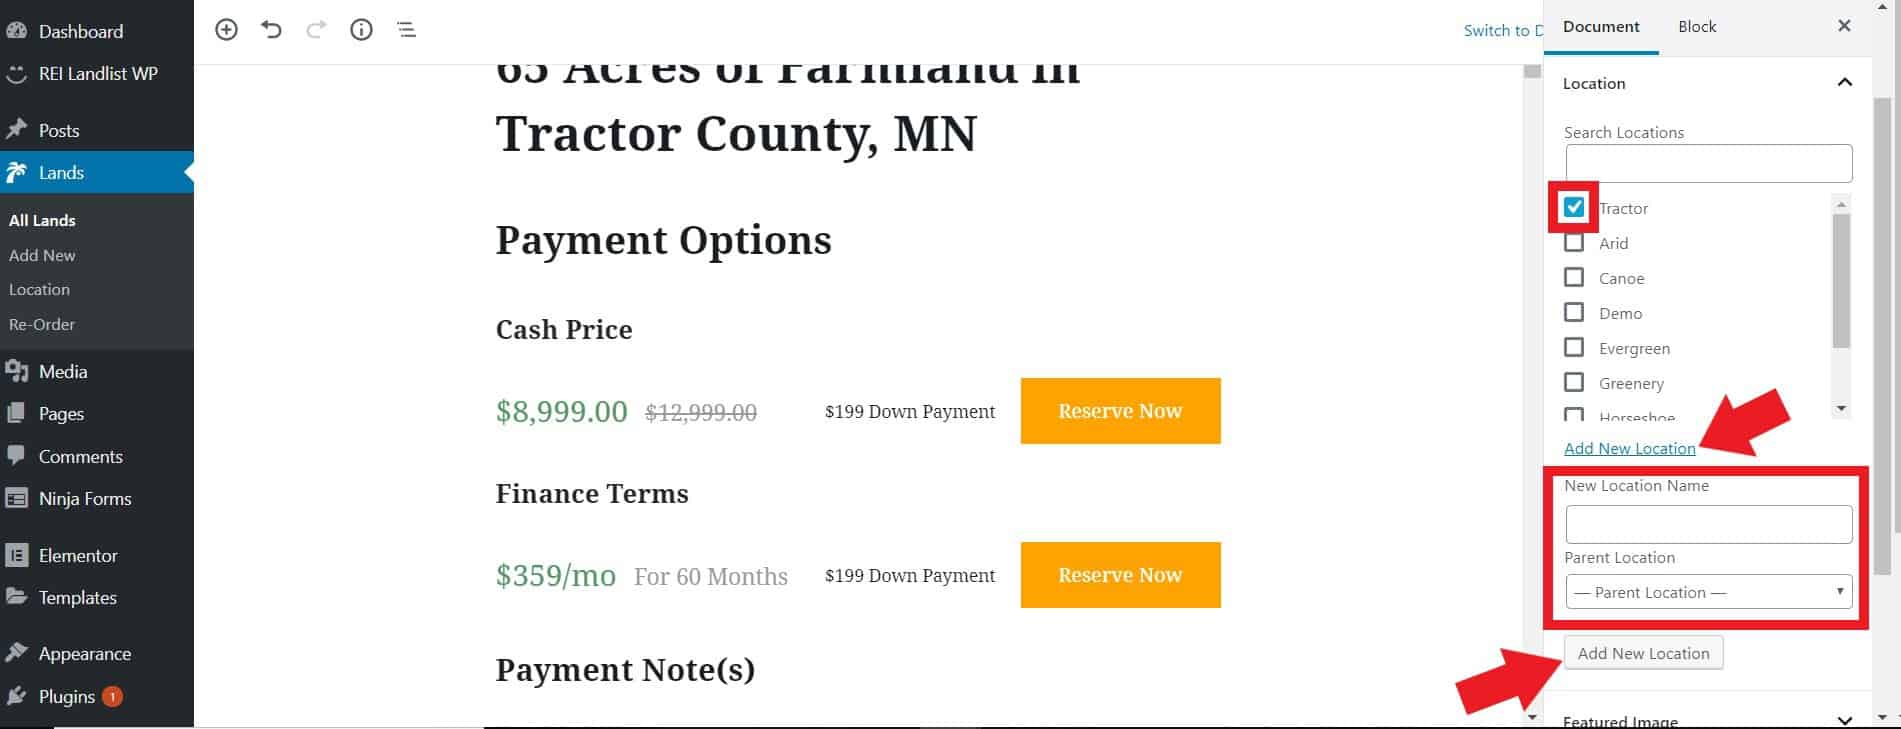
This is where you select the County/Location of your Land.
Simply click on the corresponding checkbox to do this. If you need to add a new location, click Add New Location, type in the name, and press the Add New Location button. It will then appear in the list.
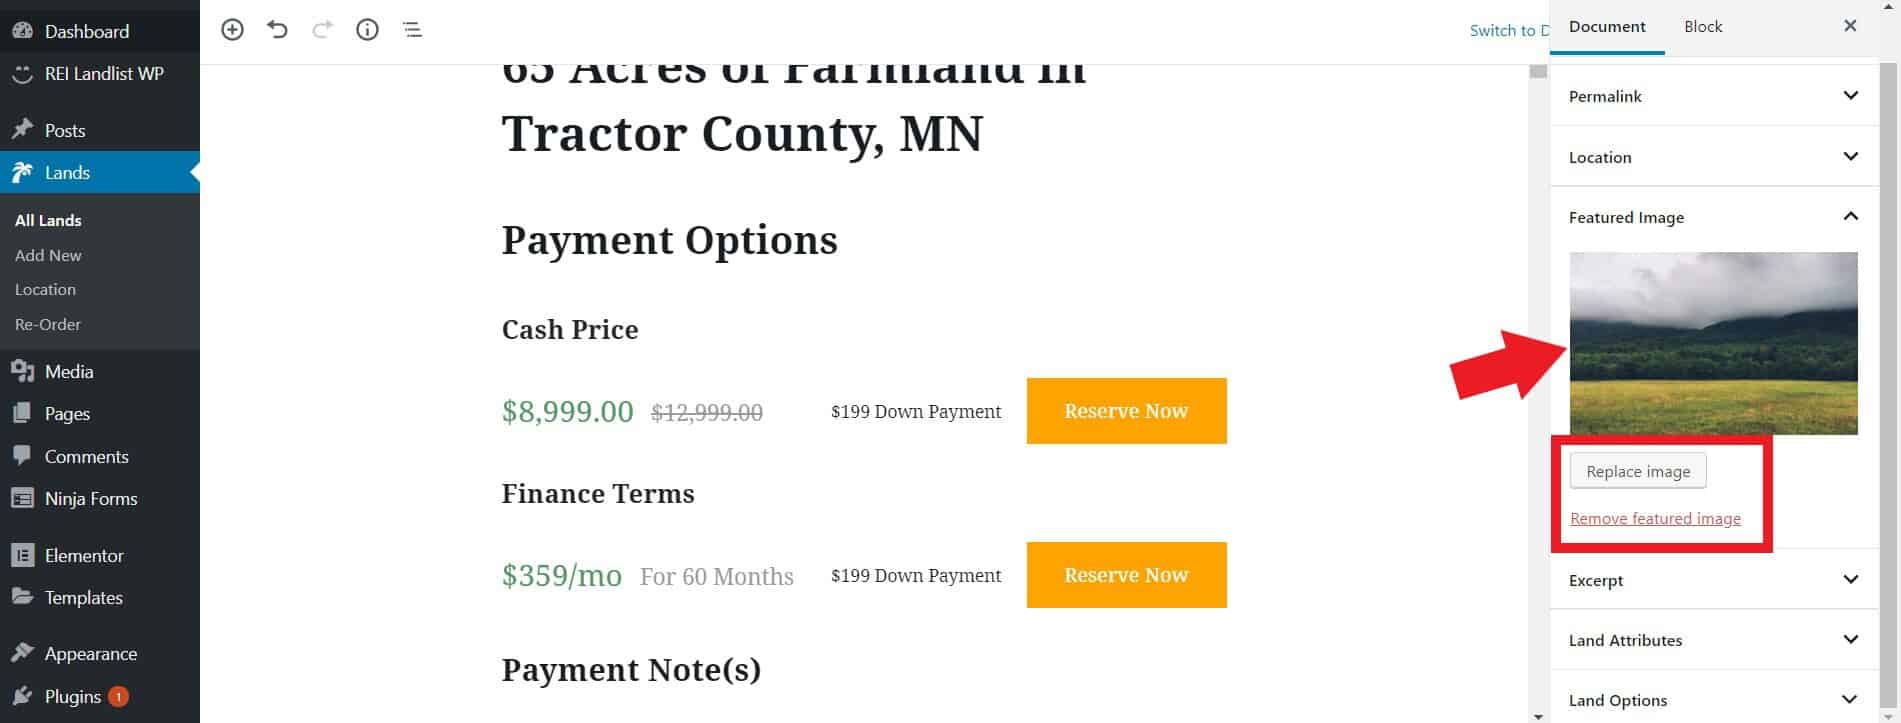
Featured Image
This is the main image for your piece of land that will be shown as a preview thumbnail on the Properties. To change it click on Replace image and the WordPress image uploader will pop up. To remove the image all together, click on Remove featured image.
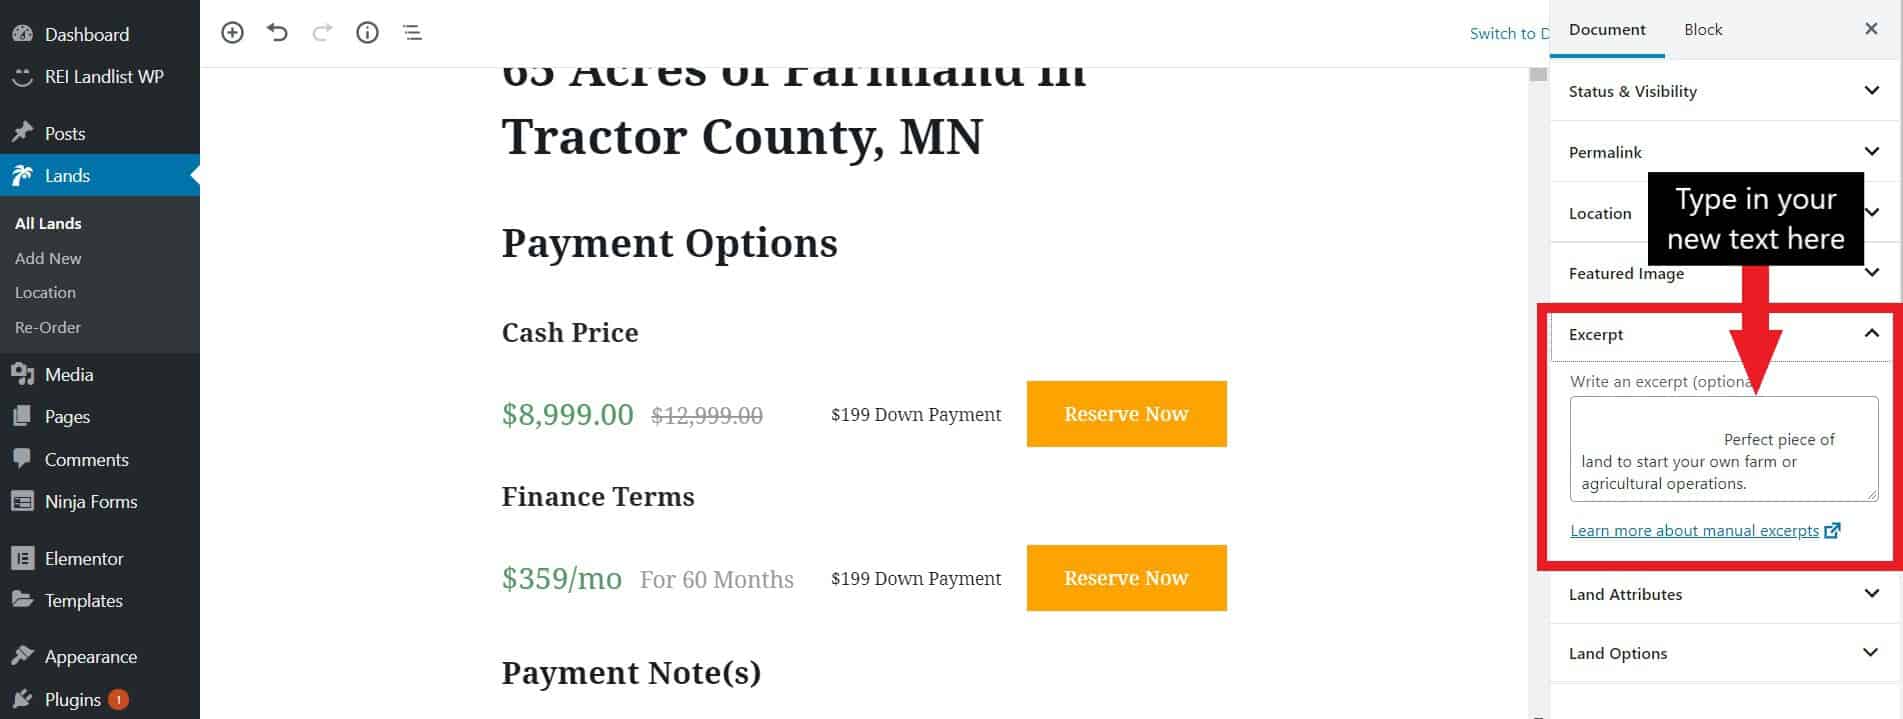
Excerpt
This is a brief description that will appear on the Properties page under the particular land's thumbnail. Keep it short and sweet. To edit the text, simply click on the box and type it in there.
Land Attributes
Order - Use this section to select the position that this piece of land will appear on the properties page. i.e. 1,2,3,4.
Land Options
The final section allows you to add a few key features of the Land that will appear on the main Properties page.
Featured Land - If you want to highlight a specific land on your Properties page and home page, you can check this box to enable a 'featured banner' in the top right corner of the land.
Unlist Site - If this is checked, the property won't be listed on your site but you'll still be able to see it on the back end.
Status - Use this to select whether your land is For Sale, Sold, or Under Contract
Land Size - Type in the size of the land in acres.
Land Size Range - Select the range the land size falls into. This is used for when your visitor or buyer wants to filter through your properties.
Land Price - Select the price range of the land. This is used for when your visitor or buyer wants to filter through your properties.

Parcel Number - This is mainly for your admin purposes but it allows you to add a parcel number to the property, so you can later filter and search for it in the WordPress Dashboard. This is particularly useful if you're listing a lot of properties.

Property Content Lock
Under Property Content Lock you will see a section for Property Note
In here, you need to put a number or phrase that will help you identify the specific property you're editing, as this information will be pulled if a lead fills out one of your pop up opt-in forms on the properties pages. If you want to find out more about the features of Property Content Lock and need help installing it, click here.

To save your changes , click Update in the top right.
.png)