Changing Colors and Fonts with Elementor
In this section we are going to guide you through the process of editing fonts and colors in Elementor.
If you the section of documentation on personalizing your site, you will have noticed we edited colors on there. However, this was just for your forms and for things such as the heading text and borders etc.
Elementor will be your go-to editor for anything you want to change on the page itself.
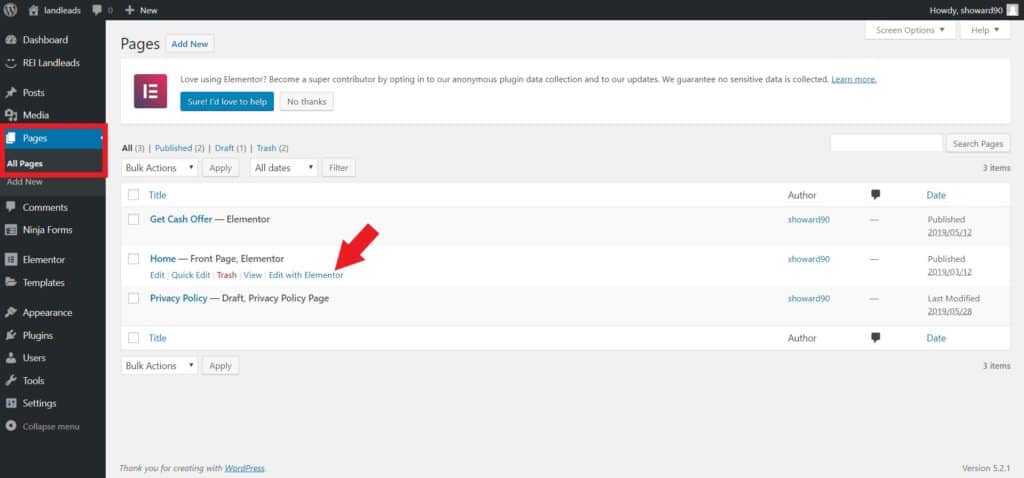
To start go to Pages > All Pages and hover over the Home Page. Then click on Edit with Elementor.
Changing the Colors
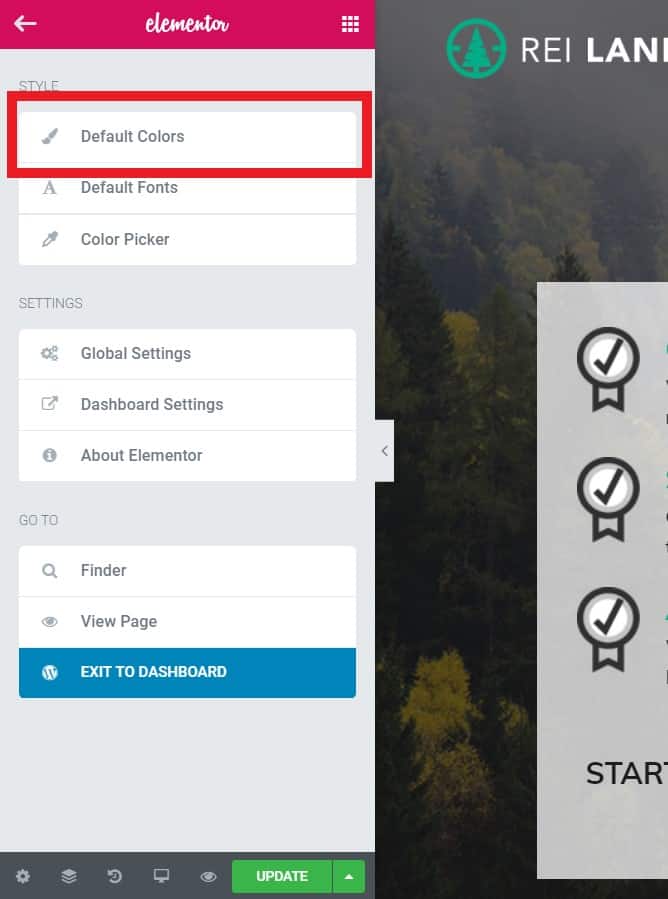
Click the hamburger button on the top left of the Elementor panel. It looks like this:

Next, click on Default Colors.
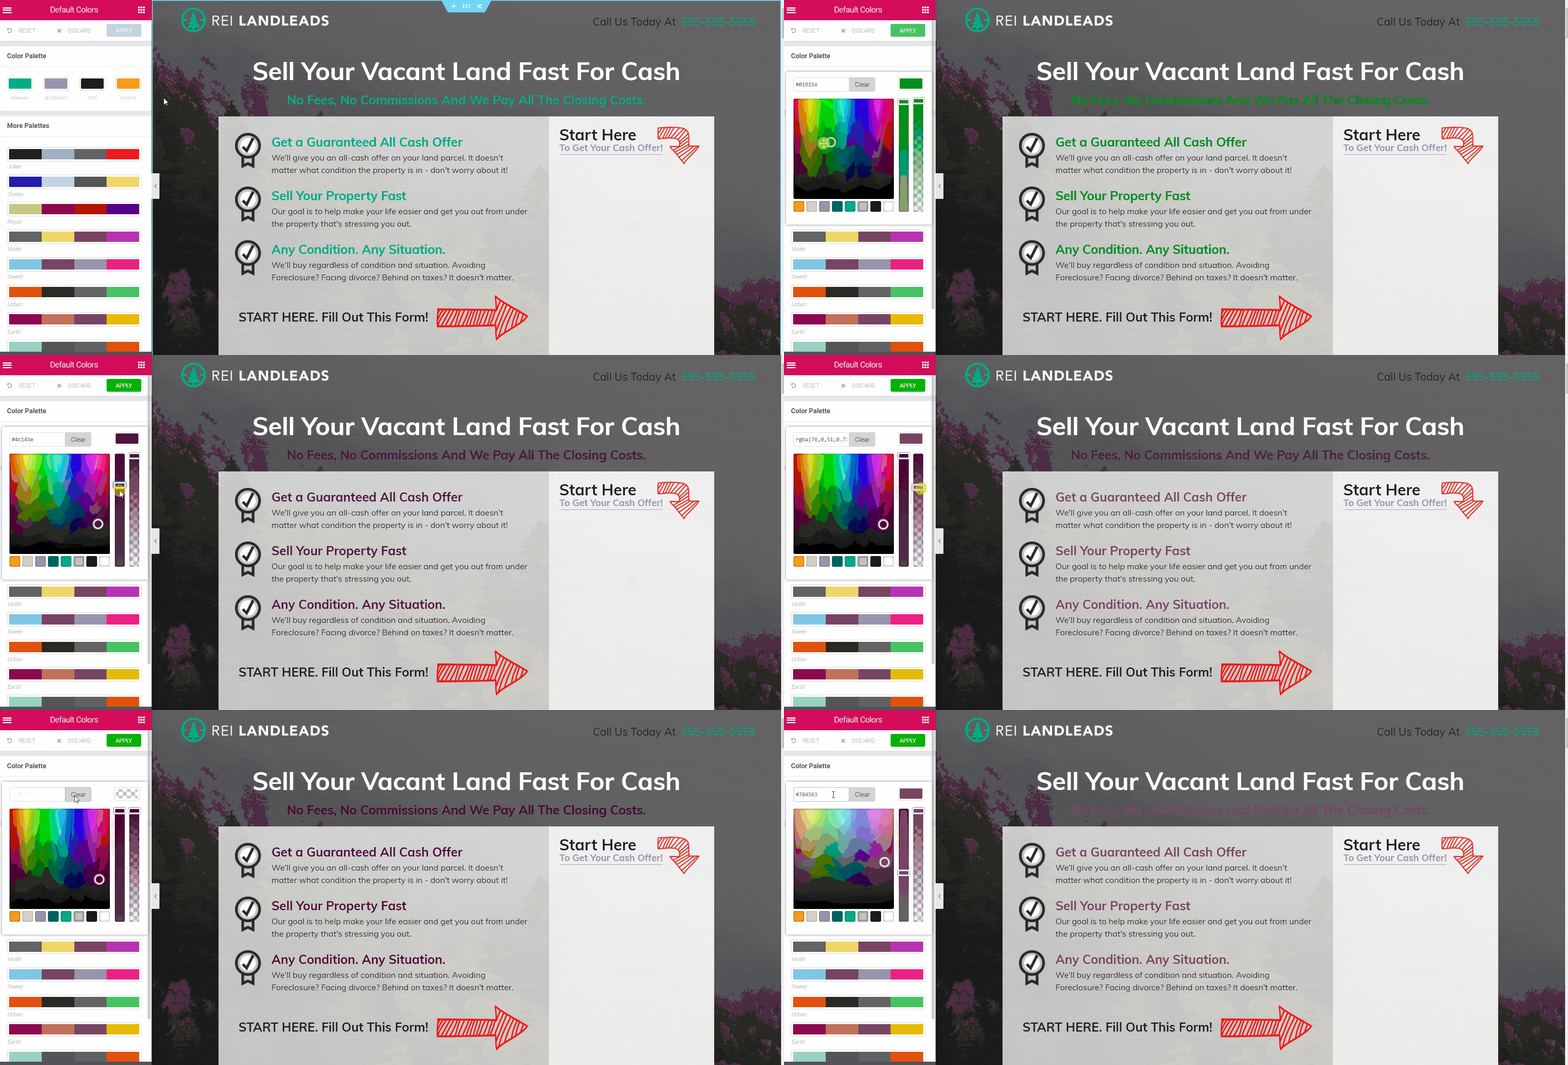
You will be presented with the four colors of your color palette at the top of the panel.

Primary - This is your primary color which is seen on all your subheadings of the page.
Secondary - Please leave this one, as there is no text on the page that has been attributed to the secondary color.
Text - This is the color of your main body of text.
Accent - This is the color of your button that isn't a part of your Ninja form.
To change any of the colors simply click on them and either use the color chart to select a color or type in a hexadecimal code.
The sliders to the right color chart the opacity of the color and the shade.
Changing the Headings
You will notice that your main headings will not have changed, i.e. the heading that says "Sell Your Vacant Land Fast For Cash".
These headings have to be changed manually. You can also do this for any other text on the page that you may want to edit as a one off.
To do this, click on the heading.
In the Elementor panel select the Style tab.
Then select the Text Color box.

Then chose your preferred color and click the color box one more time to save your changes.

Changing the Fonts
To change the font, click on the hamburger button on the left of the Elementor panel and select Default Fonts.

You will then be presented with four options:
Primary Headline - The main headings and subheadings for your site.
Secondary Headline - There are no secondary headlines, you don't need to edit this.
Body Text - The main body of your text.
Accent Text - The text in the buttons that aren't part of Ninja forms.
The names of the headings match up with the names of all the colors we went through on the previous step.
To change the font, simply click on the option of your choice, then select a font from the drop down menu. The results will populate in the live preview window.

To apply the changes, click on Apply and then Update to save.

Manual Font Changes
Just like you can with the colors, you can also change the fonts manually for "one-off" edits.
Click on the heading you wish to edit, then click on the Style tab.
Then select Typography and under Family, you will see a dropdown of all the manual font types available to you.

Once you've selected your desired font, click Update to save.

.png)