.png)
Property Maps
In Pebble, you can access two types of mapping views: an overview map on the Properties page, showing all properties in your account, and an individual property map on each Property page, focusing on a single parcel. These mapping tools allow you to view, edit, and analyze your properties and their locations.
In this article:
Properties Page: Mapping Overview
The Properties page provides a high-level map view of all properties in your account, making it easy to identify trends and plan targeting strategies.
Viewing Property Locations
- Access the Properties page to view all imported property records on a map.
- The orange circles can help identify "hotspots" or regions with concentrated mailing efforts.
- Zoom in to specific neighbourhoods or areas to see parcel locations and surrounding property details.
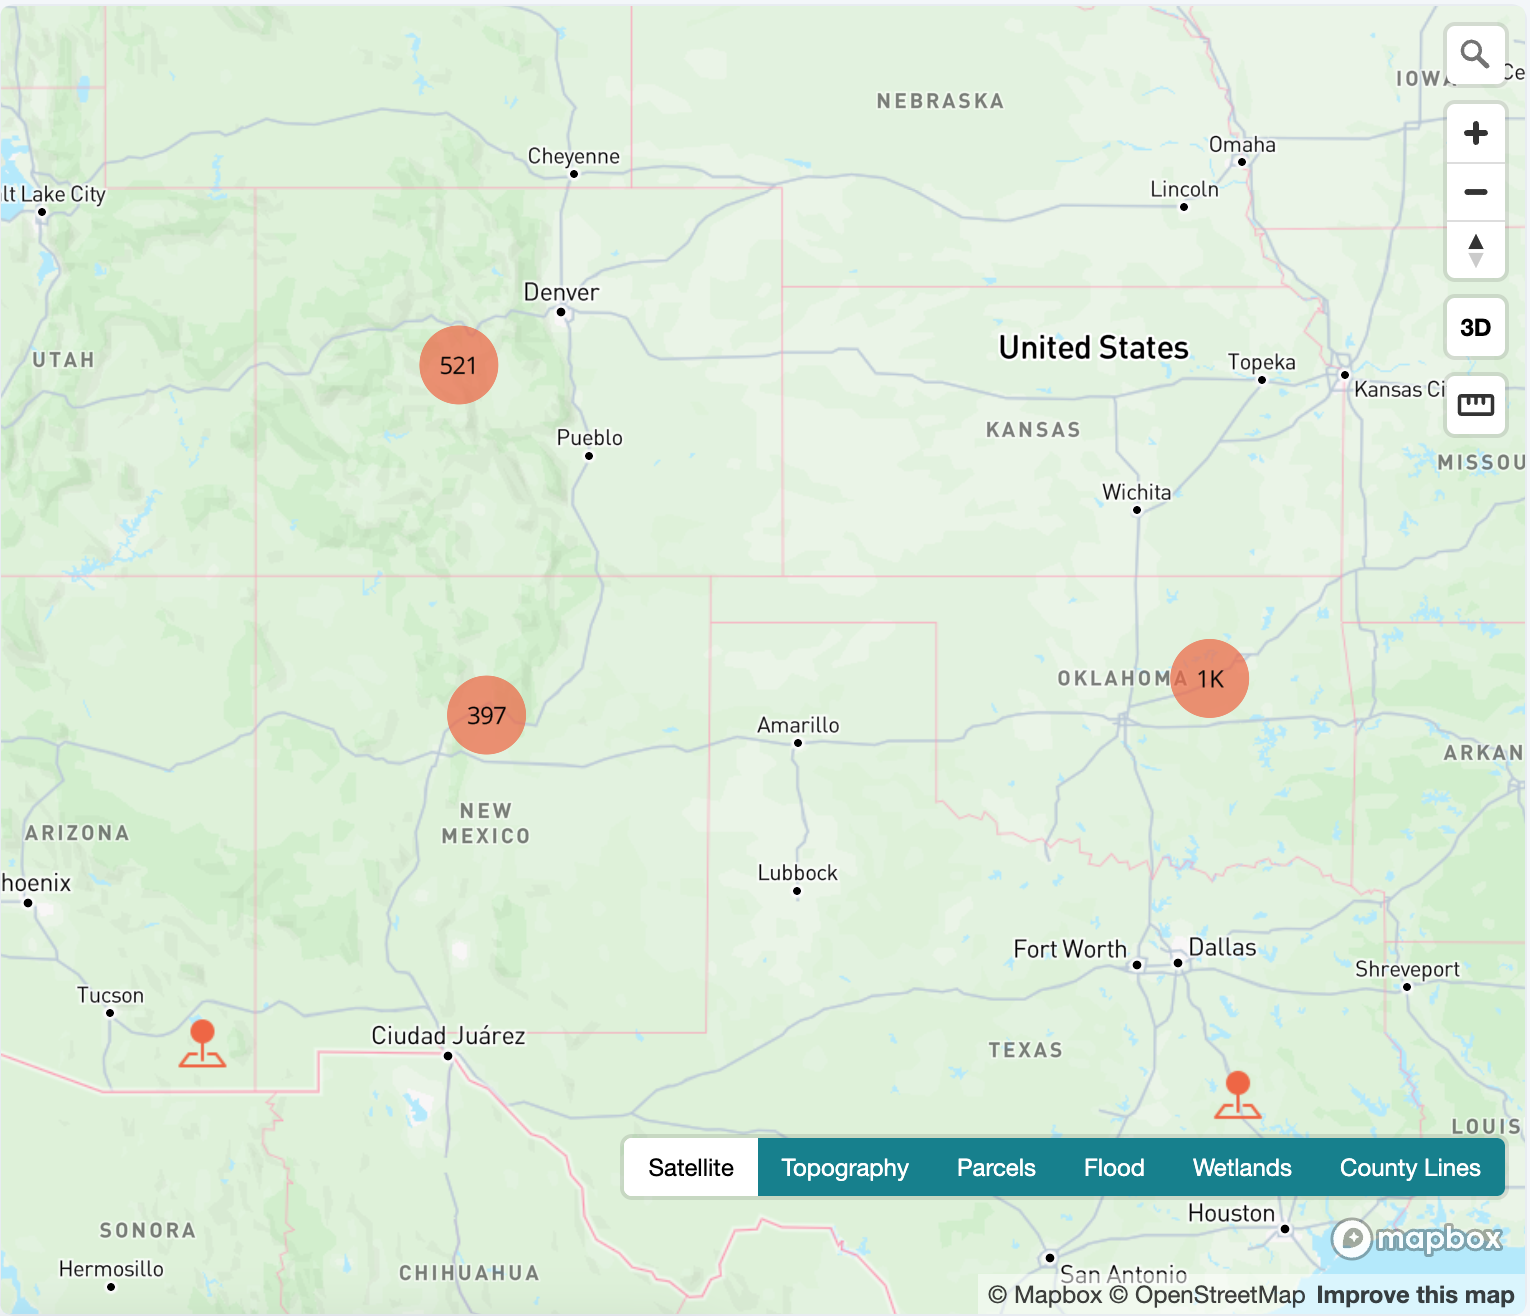
Mapping Features on the Properties Page
- Flood Zone and Wetlands Layers: Visualize flood risks and wetlands areas in different colors, based on classification.
- County Lines: Toggle boundaries to understand property locations in relation to county limits.
- 3D View: Assess slopes and terrain by rotating the map to a 3D view.
- Topography and Measurement Tools: Check elevation changes and measure distances within parcels.
Pro Tip: You can also take a screenshot of your map and add that to your marketing images so potential buyers also have an aerial view of the property.
Adding a New Property from the Properties Page Map
If you come across a property that isn't in Pebble yet, such as when a seller mentions on a call that they own another parcel nearby, you can add it directly from the Properties Page map, without running a full import.
Here's the steps:
- Click Properties on the side menu to open the overview map.
- Use the Search field (magnifying glass icon) and enter the property's address or coordinates.
- Select the matching result from the dropdown. The map will zoom to that parcel.
- Click on the parcel on the map, then select Save as Property.
This adds the parcel as a new property in your database. From there, you can attach it to the relevant contact or deal.
Use Save as Property here on the Properties page when you want to add a brand-new parcel to your database.

Property Page: Individual Parcel Maps
Each property in Pebble also has a dedicated map on its Property page, allowing a more focused view of that single parcel.
Adding Coordinates to the Property Page
The most common way to add the parcel map to a property page is by mapping the latitude and longitude when importing your records through the Campaigns section:
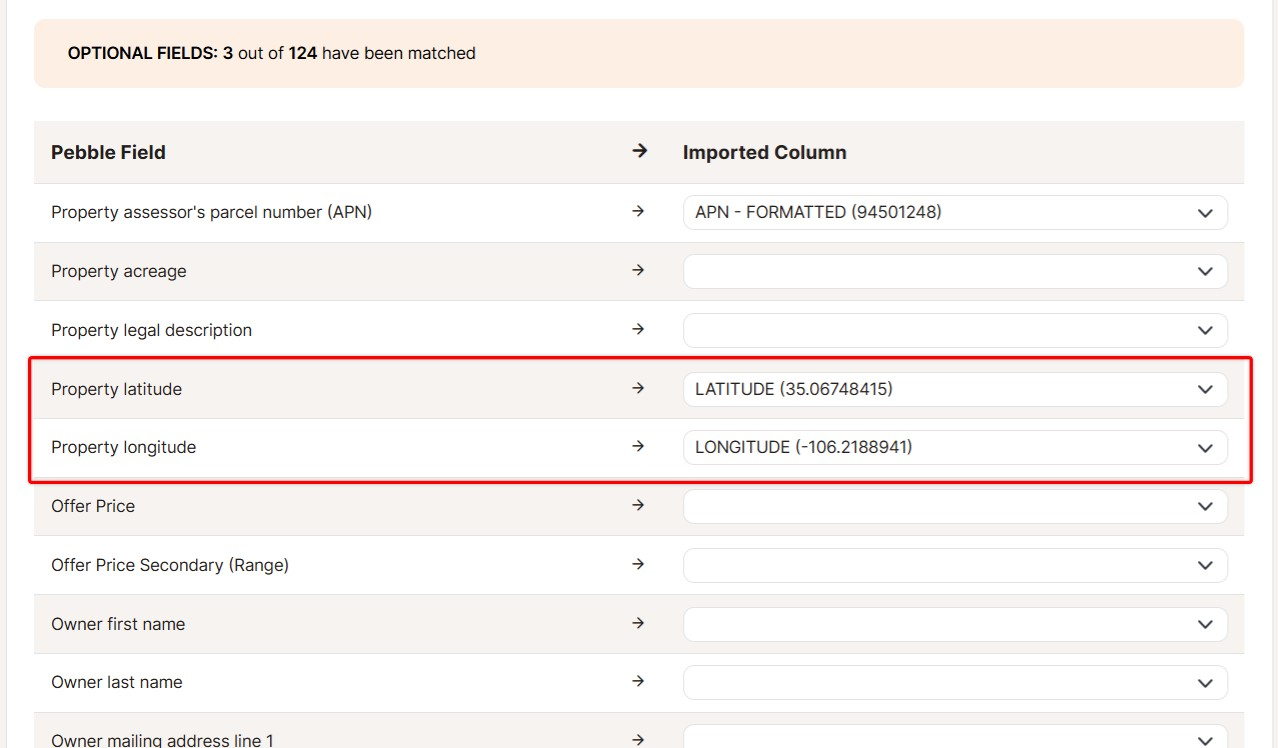
Manually Locating a Property (by coordinates)
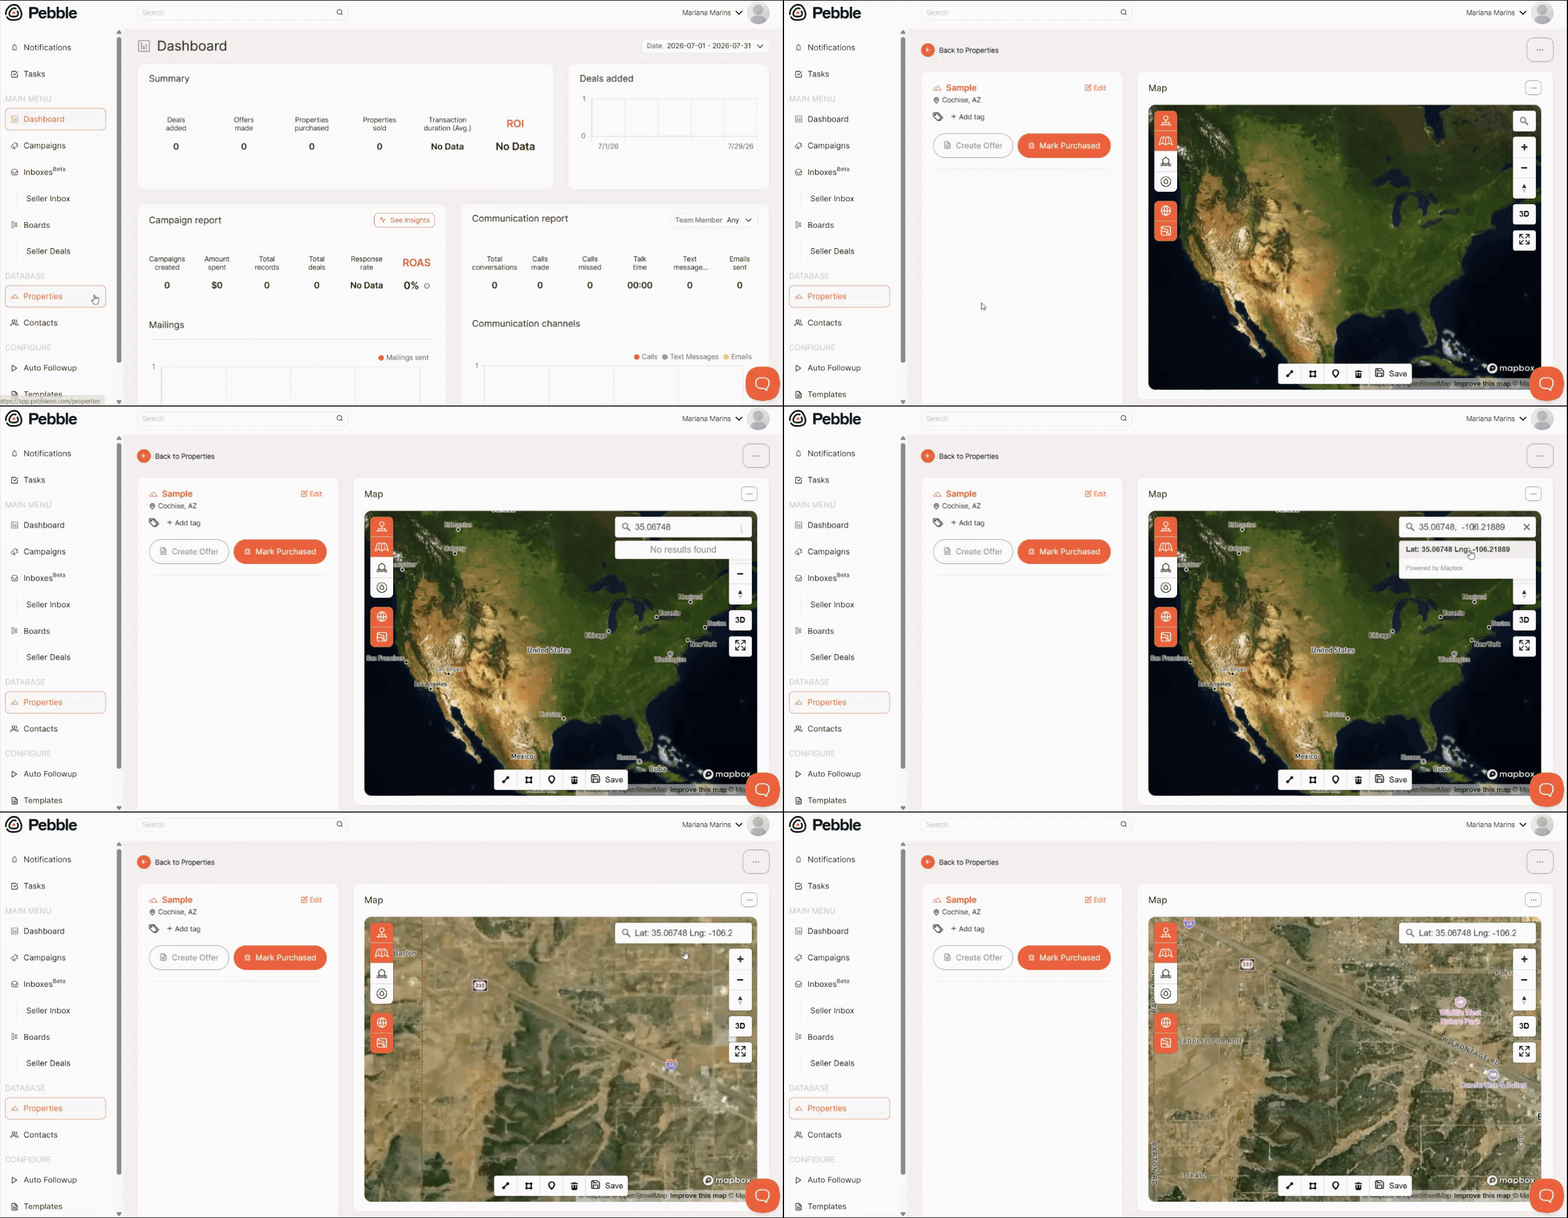
If your property does not have coordinates imported during the campaign creation steps, you can still manually add coordinates to your property and locate the property on the map.
- Click Properties on the side menu.
- Choose the property you'd like to edit and click on it.
- On the property page look for the 'Search' field (magnifying glass icon), then the coordinates in there. A dropdown with a few options should show up. Click on one of the options and the map will change to that specific area.
Then, find the parcel on the map, click on it and select Set Property Lines. The new map will be saved automatically.
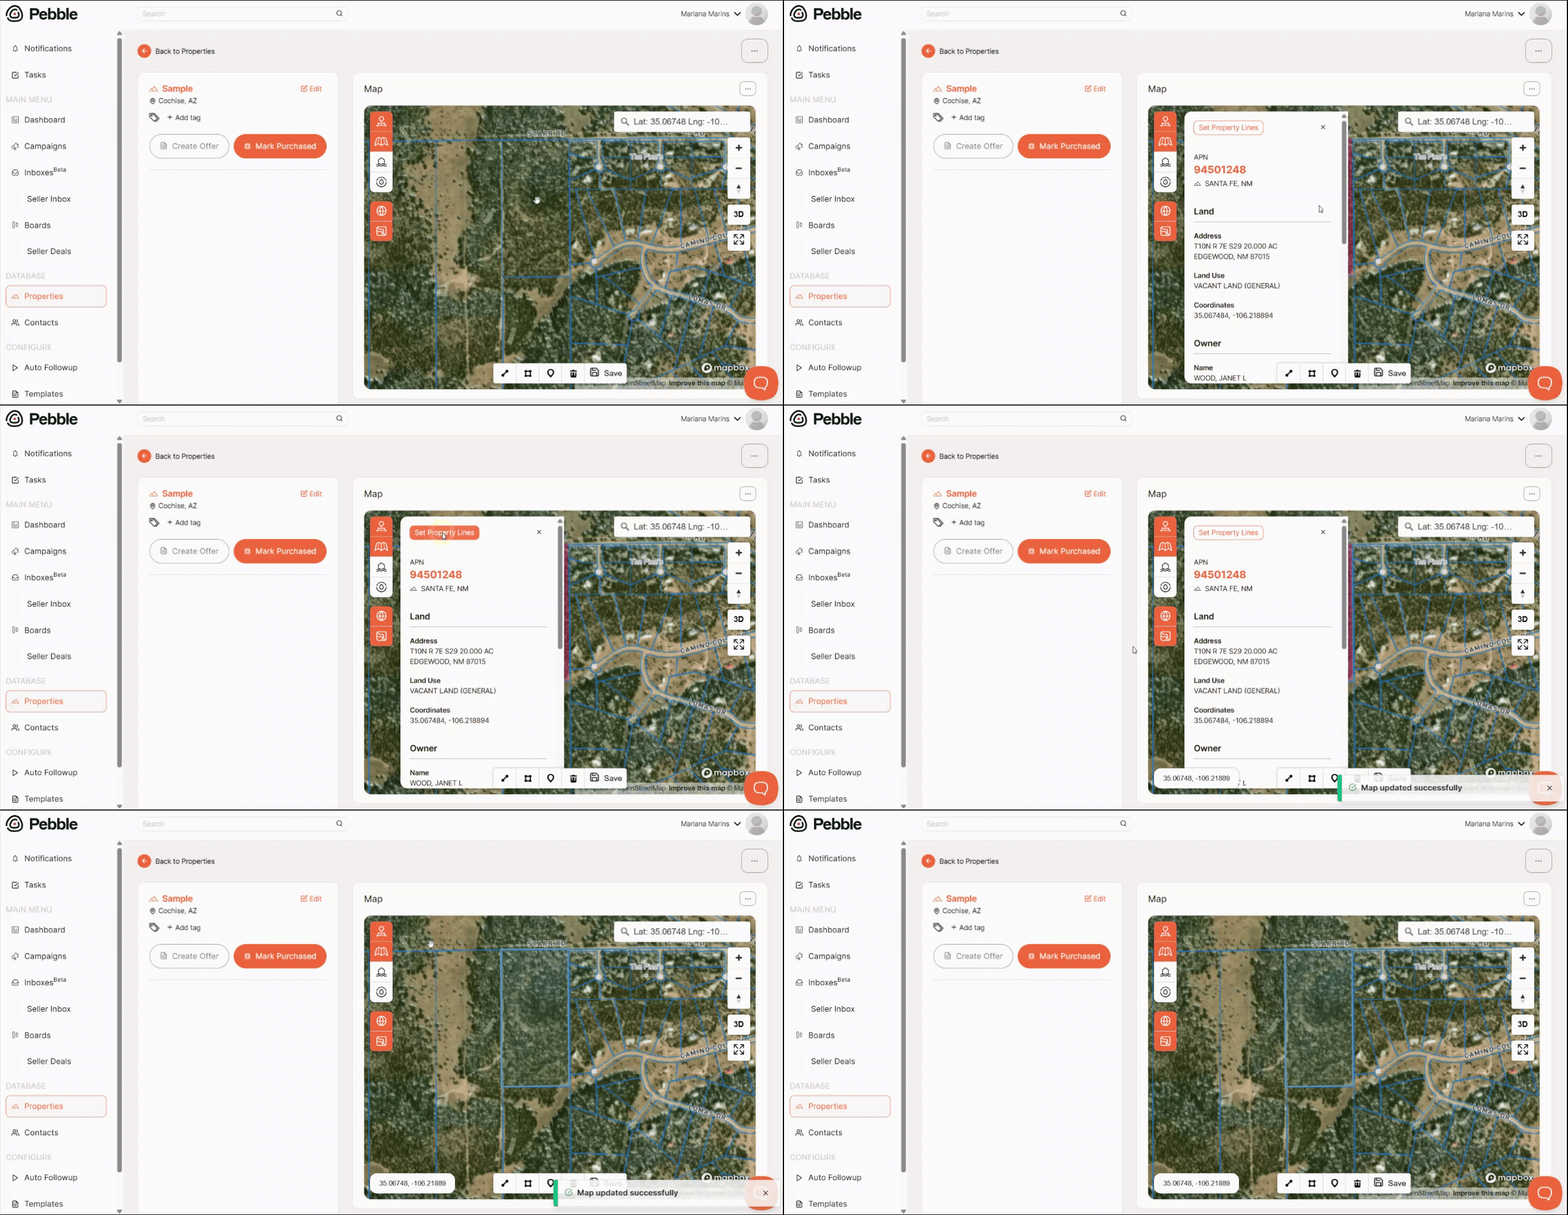
Note: The formatting of your coordinates should be latitude comma longitude with no spaces (e.g. 48.704060,18.396170).
Editing existing coordinates
When importing your properties to Pebble, if you include coordinates in your CSV file, an automatic one-acre square will appear around the center of these coordinates as you can see below:
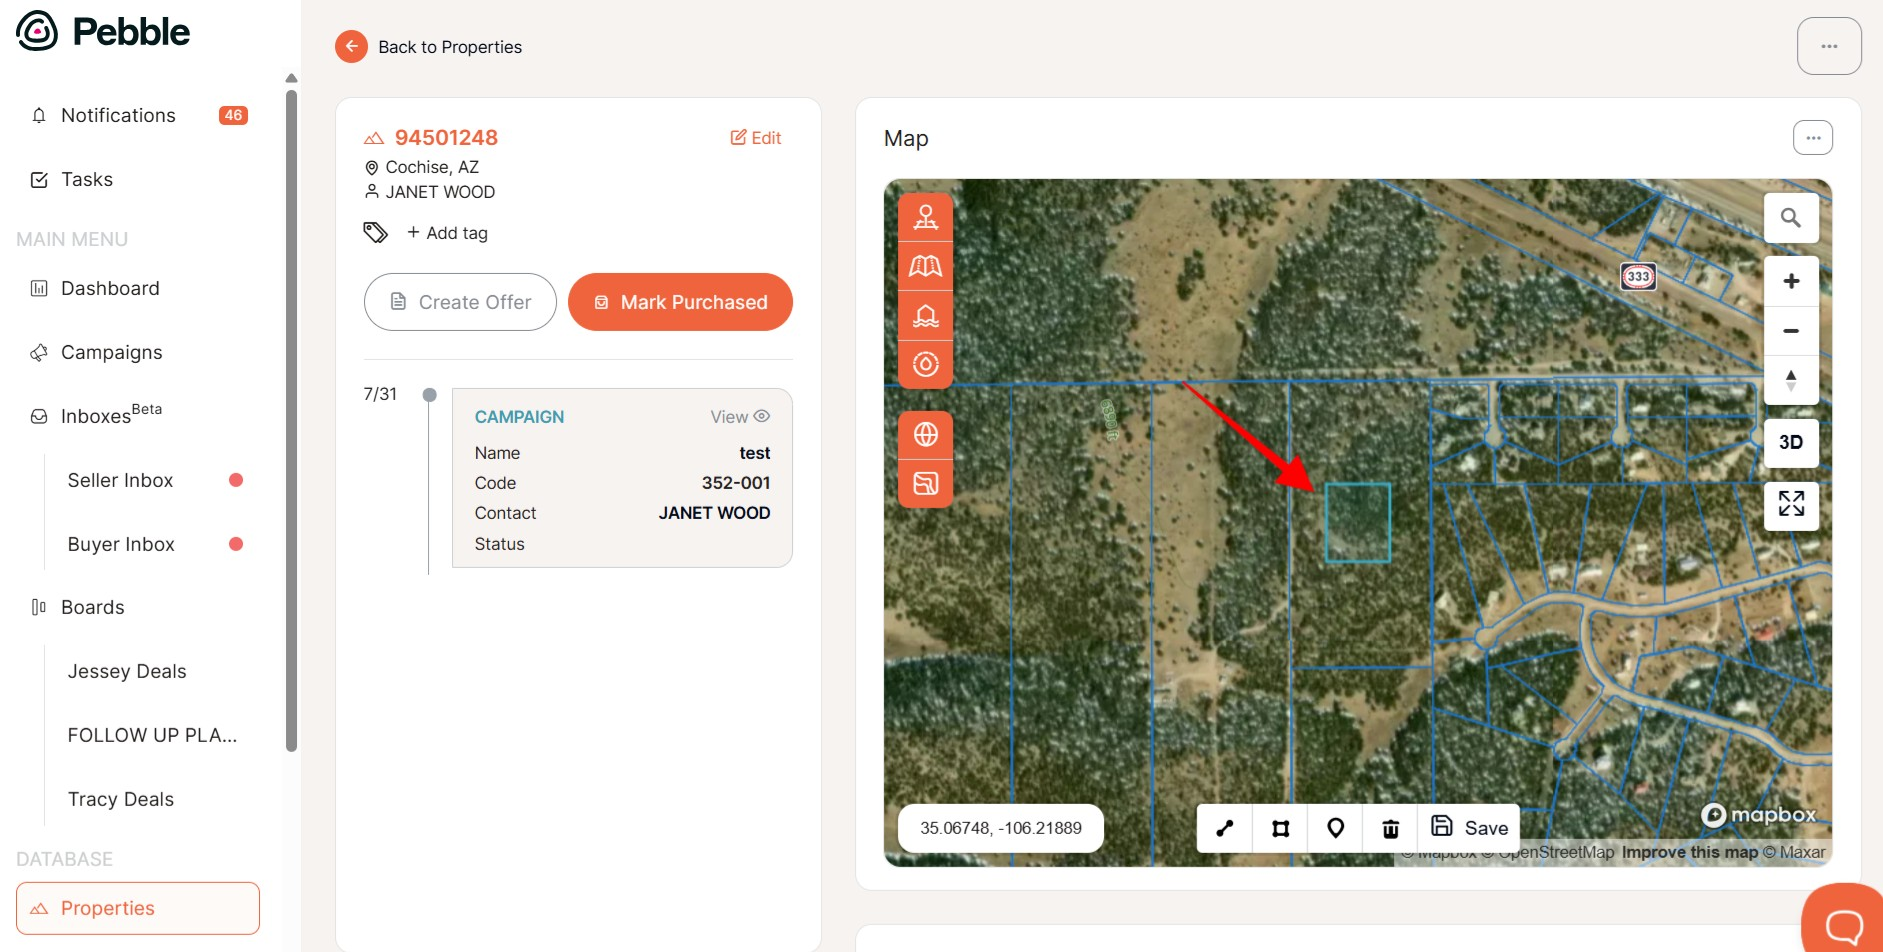
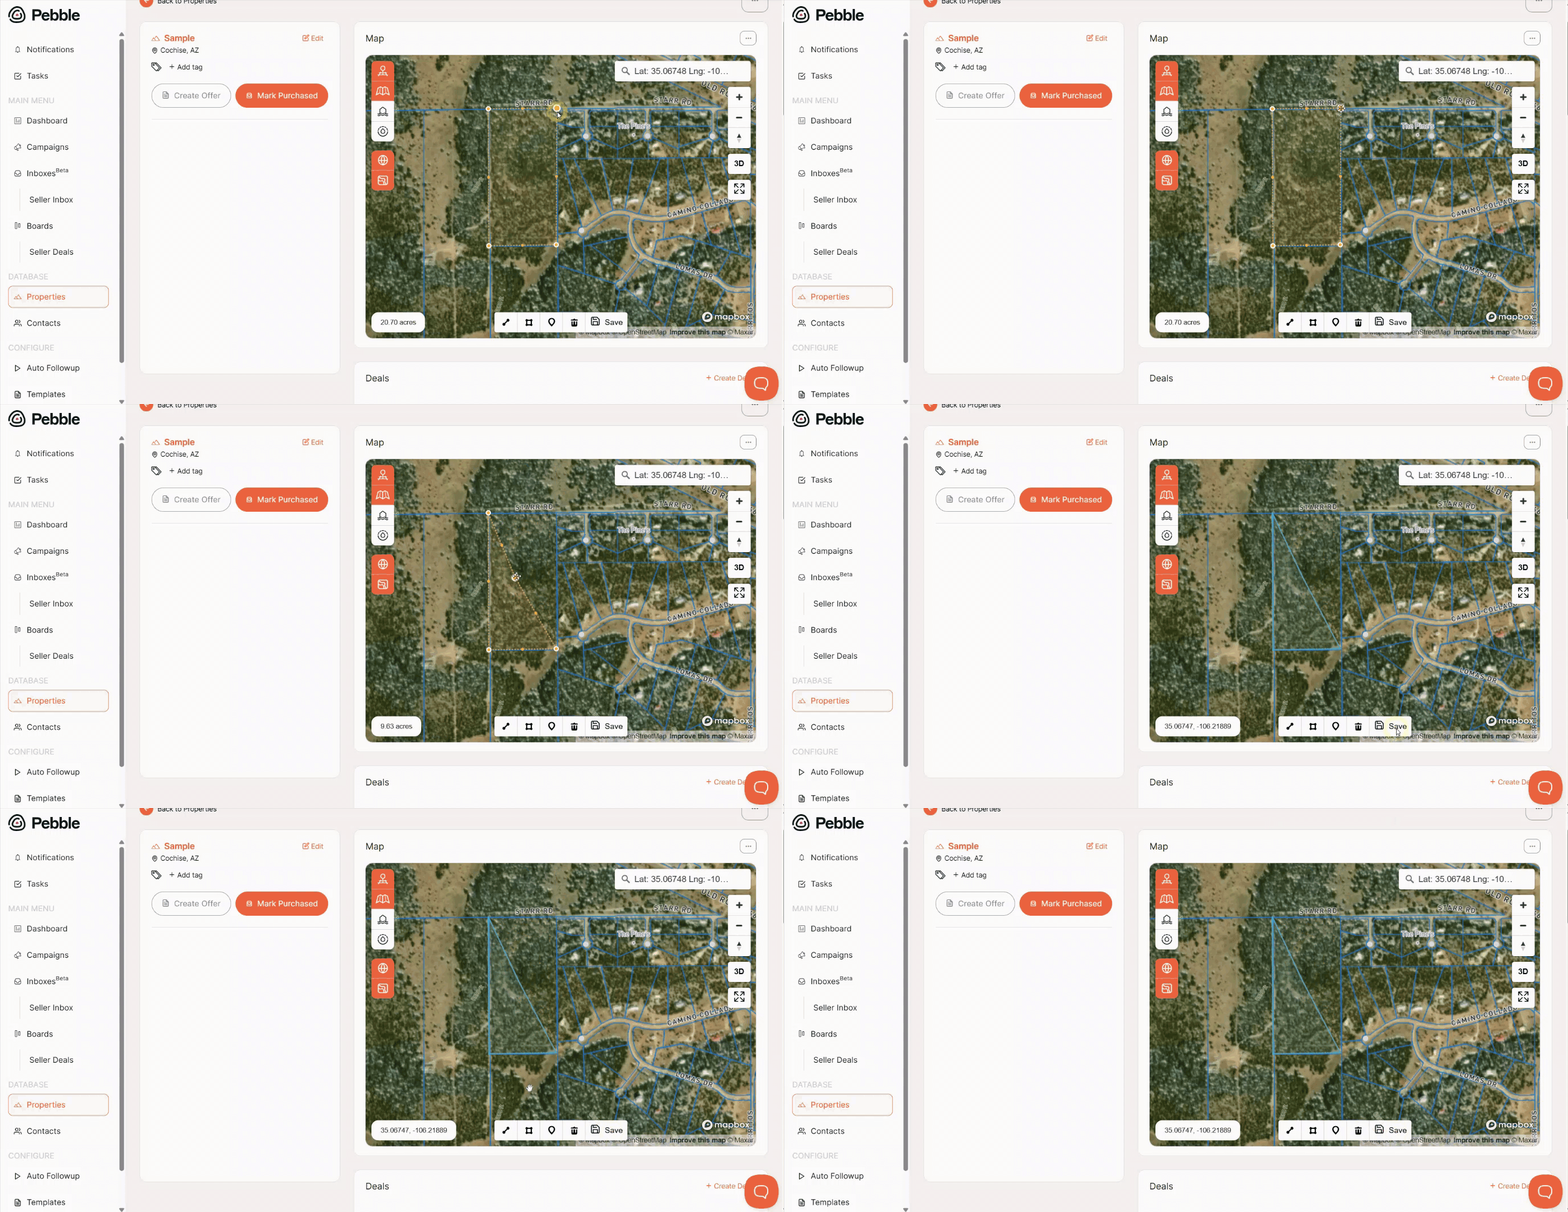
- In the property page, double-click the light blue lines of the parcel.
- A pop-up will show up and you can close it.
- Then, the lines will turn orange. That's to show that you can drag and drop them to form whatever shape you want.
- Once you are done, click Save.
You may need to zoom in on the map to get more detail.
If you have a KML file with existing properties, you can upload them, as well. Just click the ellipsis button next to the map.
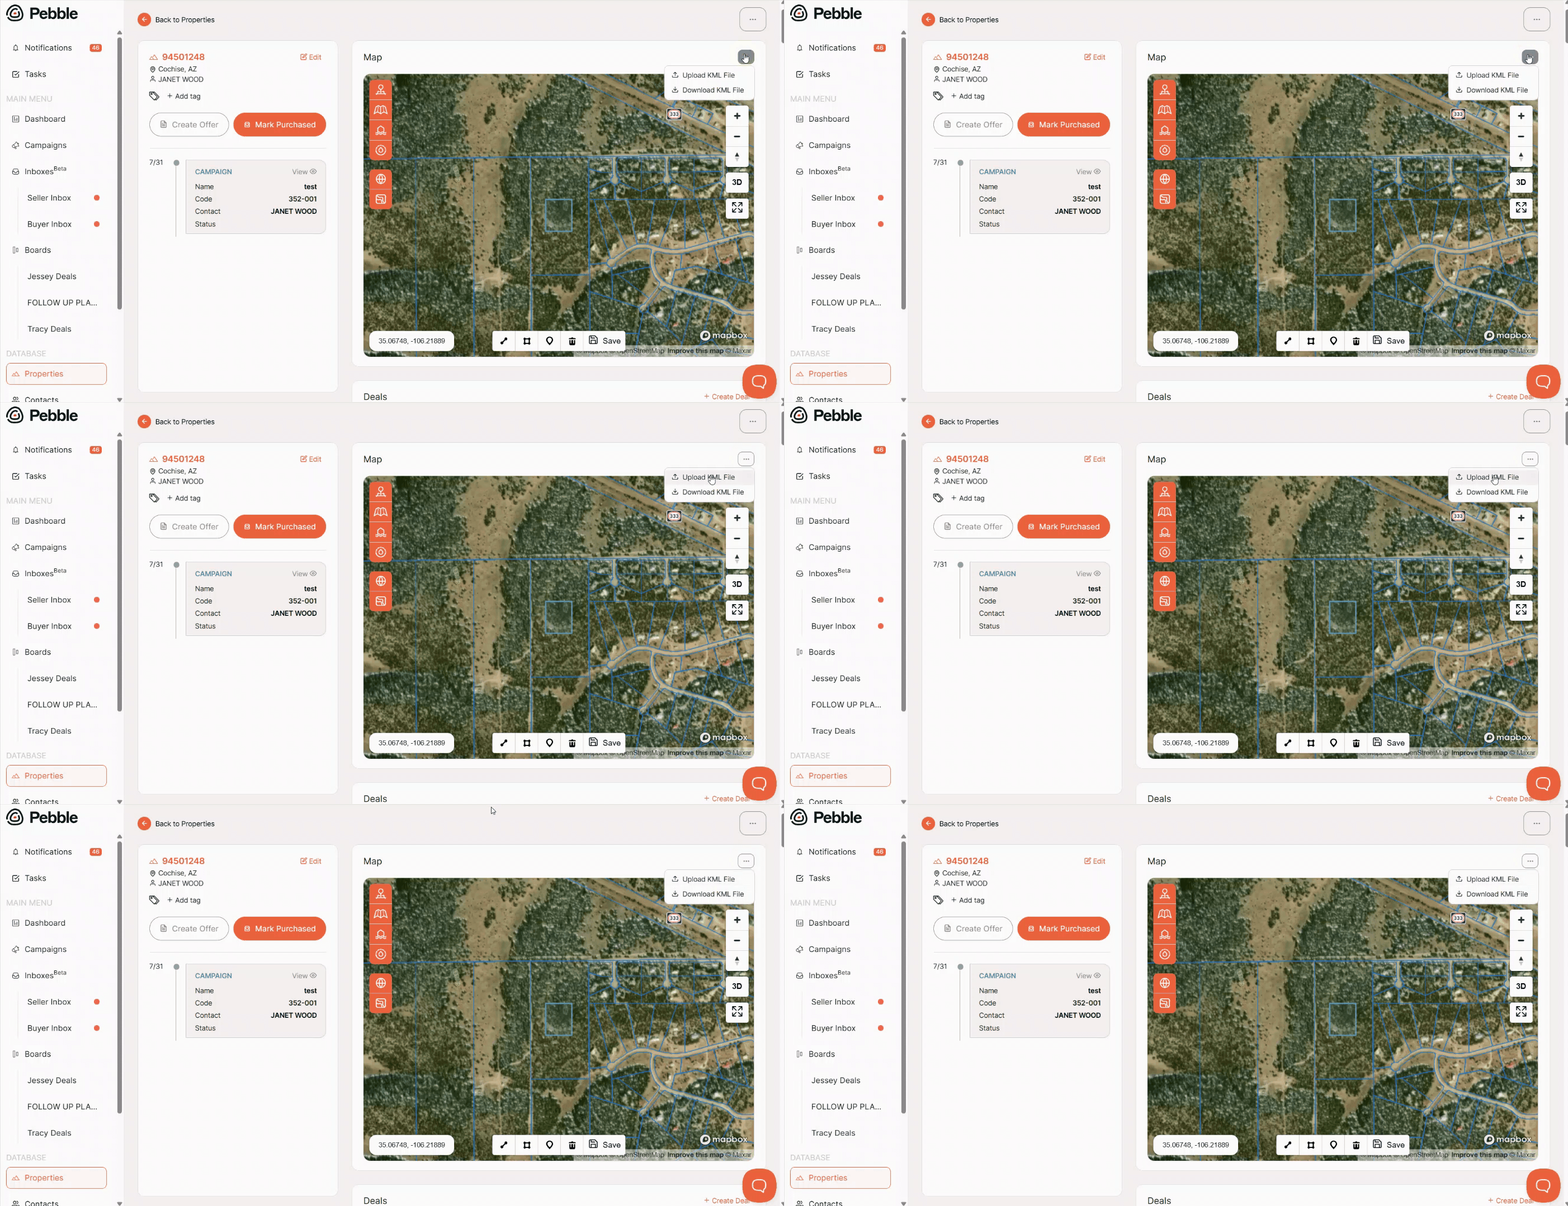
Once this is done, you may want to download a KML file which you can then upload to Google Earth and you'll be able to source 3D imaging of your property to add to your marketing material. To download the file, simply click on Download KML in the ellipsis button and follow the Google Earth instructions here.
Note: Please keep in mind that uploading a KML file with existing properties will be considered pulling properties with the parcel selector and will be added to the parcel load charge