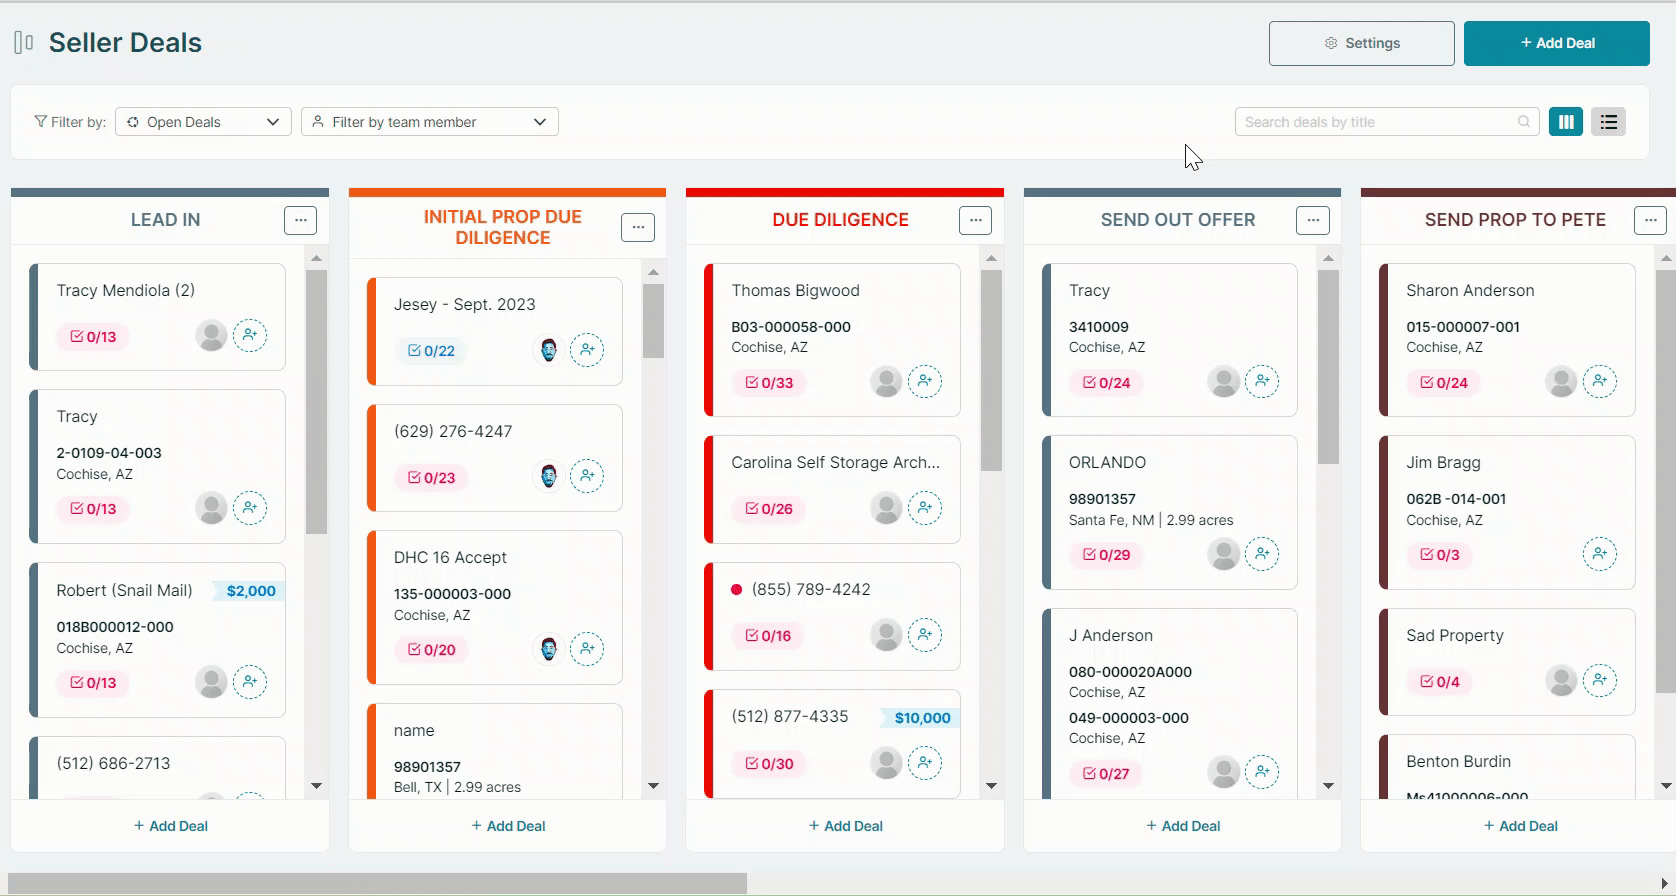
.png)
Tasks
Pebble makes it easy for you to track all the activities that need to be done as a part of your acquisition and sales cycle. This article will guide how you can manage your tasks.
In this article:
Creating Tasks
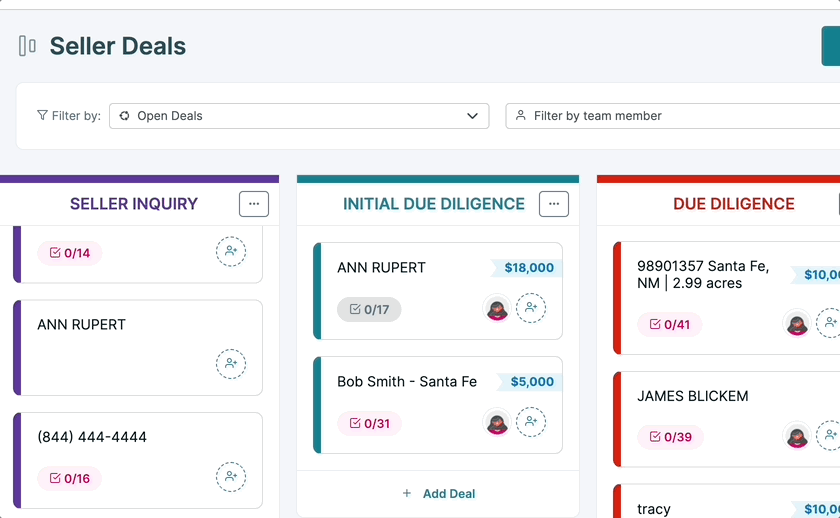
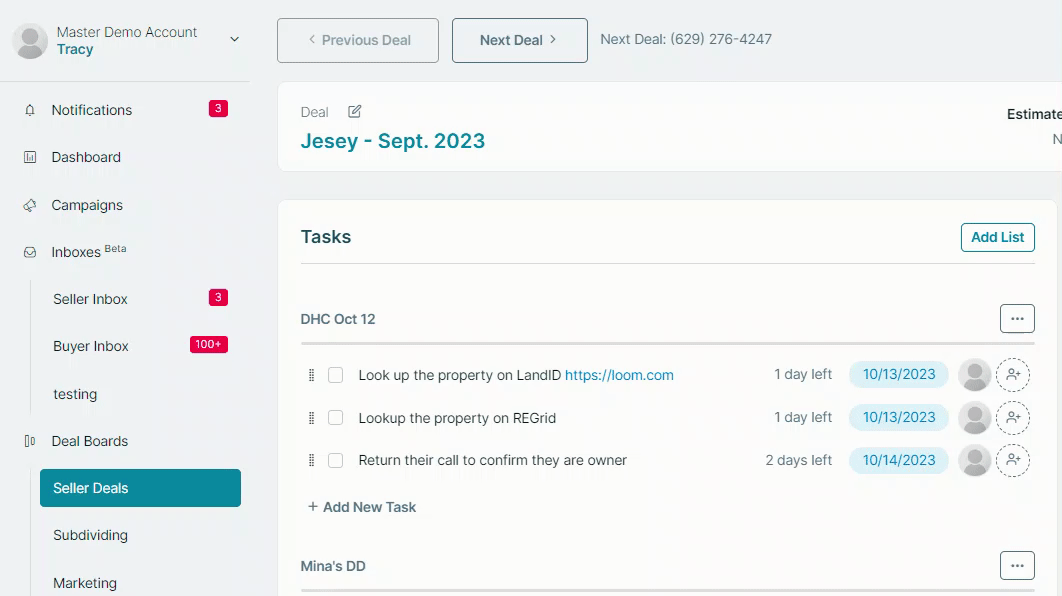
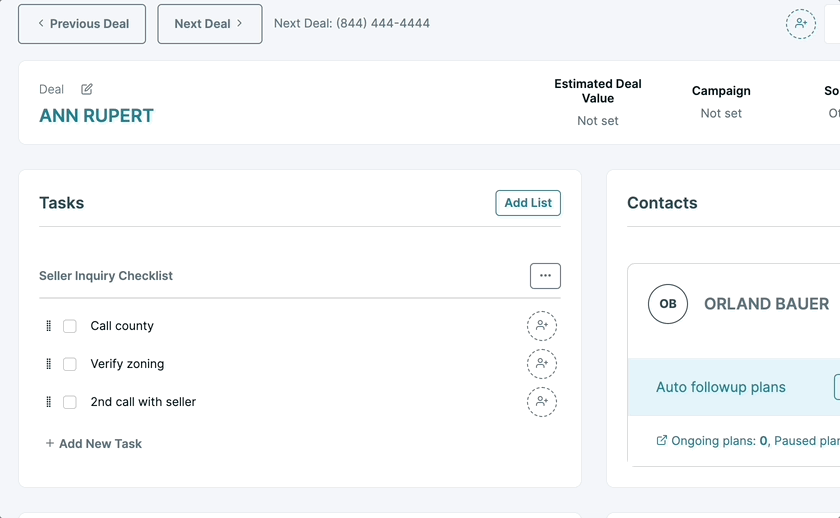
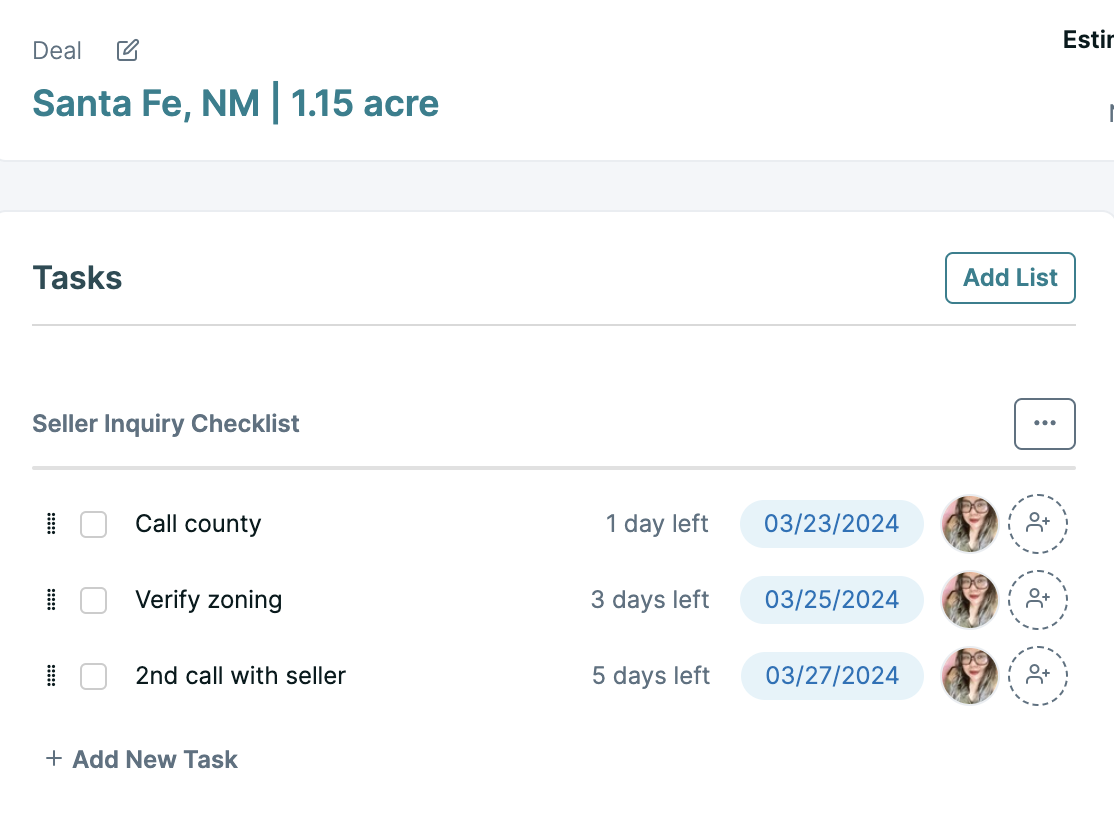
In order to create a Task in Pebble, you'll need to head to a Deal on your Deal Board. Click into any Deal and navigate to the Tasks section. From there, click Add List and give your Task List a name.
You'll then be able to create Tasks within that newly created Task List. Add a due date and assign each Task to either yourself or another team member.
Task List Templates
Save the series of Tasks as a Template so you can easily apply them to Deals you create in the future. After you created the Tasks, click the ... button to the right and select Save as Template. From there, you can assign each Task to yourself or another team member.
The next time you create a Deal, you can simply select the Add List button to apply the Task List Template we created.
Stage Automation
Automate the process of adding your Task List Templates to Deals with Task List Automations.
Note: Automations are available on the Growth and Scale plans.
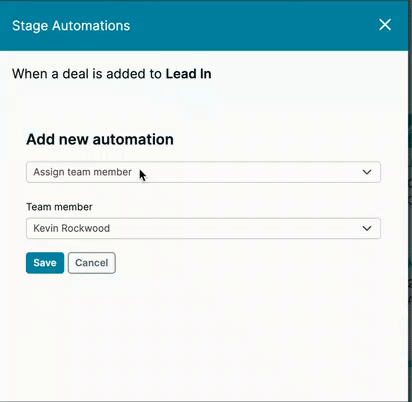
Head to your Deal Board and select the Stage that you'd like to set up the automation for. Click the three dots in the upper-right corner of the selected stage and select Setup Automations. The Stage Automations window will open.
Click the dropdown menu under the Add new automation button; select Add task list. Select the Task list template. Click Save.
Now, whenever a deal is moved to that specific stage, the tasks included in the task list will be automatically generated.
Following these steps will help you create a task list in Pebble, ensuring that relevant tasks are automatically added when deals progress to the designated stage.
Viewing Tasks
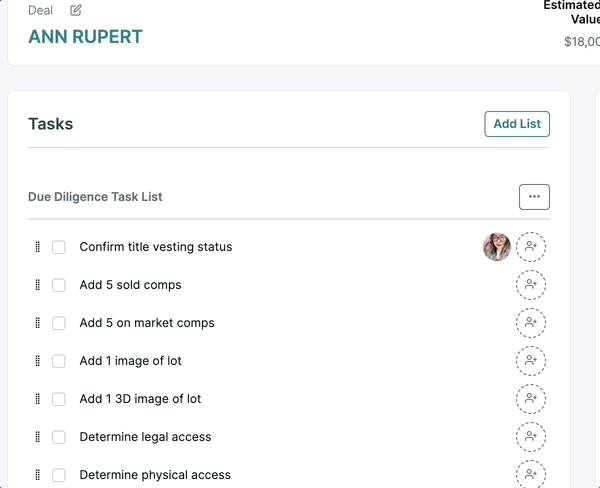
To view the Tasks created; go to a Deal where the Task List was added. The list of Tasks will be displayed.
You can also view all of the Tasks that are assigned to you or other team members by going to the Tasks section on your Dashboard. Learn more about the Unified Task List here.

Deleting a Task List
You can always delete unnecessary Tasks whenever you want. Go to the Tasks List. Click the three dots in the upper-right corner. Select Delete. Confirm the deletion by clicking Delete List.
Editing and Deleting Tasks Inside a Deal
Keep in mind that you can edit a Checklist. For example, you can change the name, and add or remove tasks.
Just click the three dots on the right side of the task title and select Edit.
Edit the necessary information, such as the title, due date, and assignee. Hit Save. You can also opt to delete an individual Task by selecting the Delete Task option.
