.png)
Website: Using Elementor To Edit Pages
In This Article
What is Elementor?
REI Website uses a powerful and user-friendly page editor, Elementor. This plugin allows you to have complete control over your website and uses drag and drop technology to make the whole design process much simpler.
Elementor also allows you to live edit the content that’s in your blocks so you can make modifications and see results instantly.
ATTENTION You don’t need to subscribe to Elementor Pro for it to work with REI Website. The free version will suffice.
Using Elementor to Edit Pages
After REI Website is set up, the demo contents are installed by default. You'll have a template right in front of you so you can start editing that to your liking. Simply click on the section and edit it in real-time.
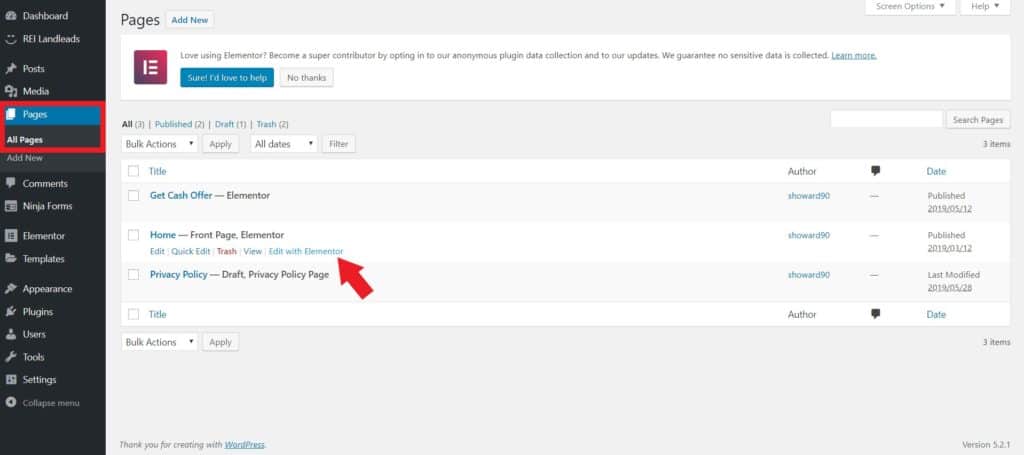
- Go to Pages → All Pages.
- Hover over the page you want to edit. You will see an option to Edit with Elementor.
- You will then be presented with a live preview of the page you selected and to the left you will see the Elementor panel.
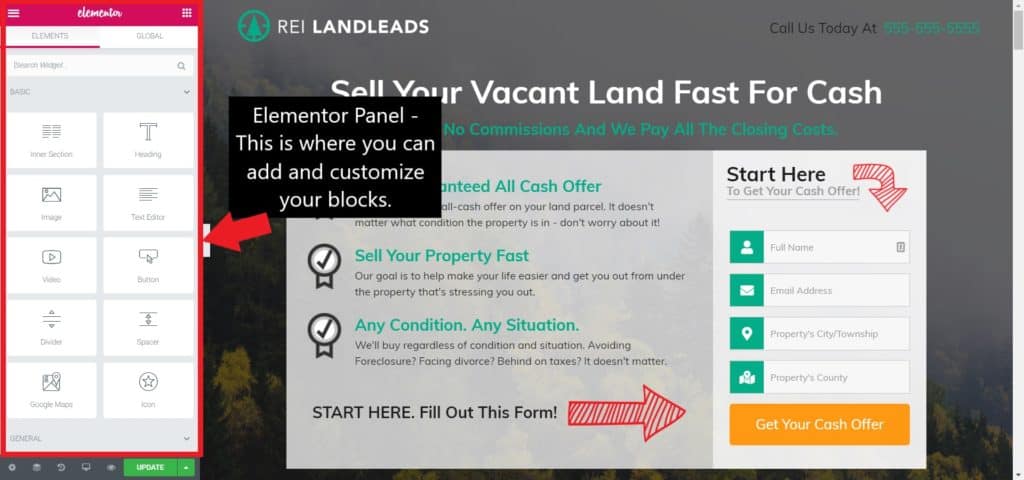
- Alternatively, you can add your own extra sections using the Basic, General and WordPress widgets under the Elements tab of the Elementor panel.
Build Your Page
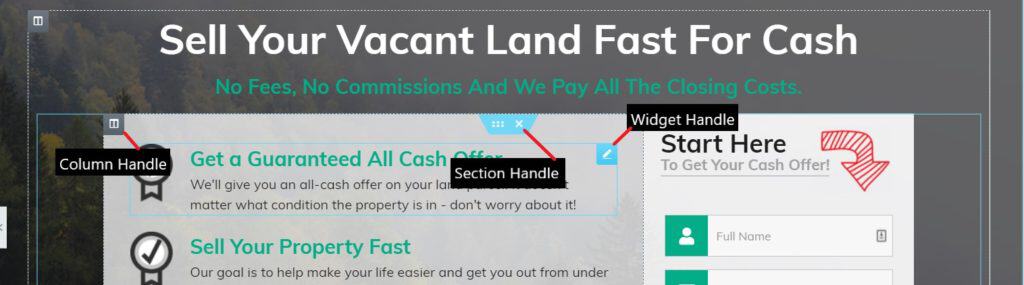
Main Building Blocks
- Section - When you hover over parts of your page, a light blue box will appear around the outside, this box defines a section.
- Column - Inside the section, it has columns. You can have up to 10 columns in a section.
- Widget - Inside columns, you have various widgets you can choose from in the Elementor panel.
How to Add a Section/Column/Widget
- To add a new section, simply click on the blue + in the section handle. A new section will appear with a couple of options.

- Click on the pink + sign to set your column structure or you can drag them across from the Elementor Panel on the left-hand side. For example, if you want to add an image section you would do the following:
How to Delete/Move a Section
To delete a section, simply click the x on the section handle.
To move it, click and hold on the ::: button in the middle of the section handle and drag it to where you want it.
How to Customize a Widget
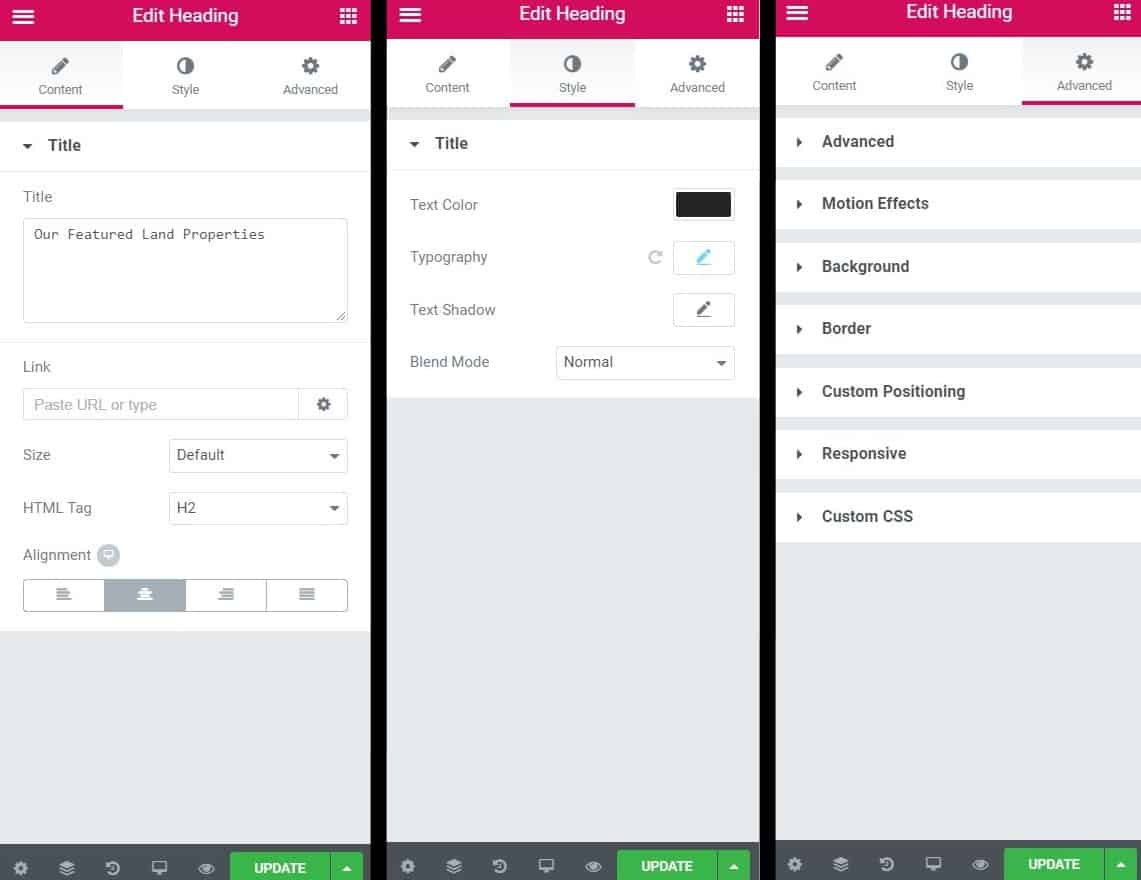
Each widget in Elementor is fully customizable. Once you click on a widget, the Elementor panel will show you all the options you have to customize the widget.
For example, in the Heading widget, there are three tabs dedicated to customization; Content, Style and Advanced. Each with their own subdivisions offering even more custom options.
NOTE If you want to find out more about what each Elementor widget does, you can check out their full documentation here for an explanation.
How to Make Your Pages Mobile Responsive
With the majority of website traffic now coming from mobile/tablet devices, it is more important than ever to ensure that your landing page is fully optimized for mobile.
Elementor comes with the ability to change certain parts of your site to look more appealing on different screen sizes. Here are some options you can change:
- Column Width
- Font Size
- Alignment
- Image Size
- Padding and Margins
- Hide/Show Elements
Edit Widgets for a Specific Device
In Elementor Panel, whenever you click the desktop icon next to an option, you will see the expanded section for 3 viewport options: Desktop, Tablet and Mobile. As you can see below, you can set different Margins and Paddings in different viewports.

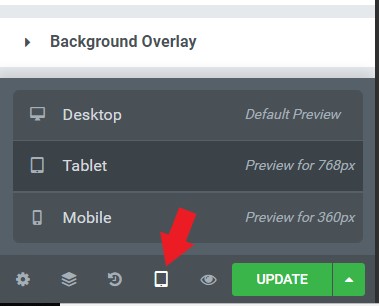
Switch View Between Mobile, Tablet, and Desktop
You can also toggle between mobile, desktop and tablet view at the bottom of the Elementor panel on the left.
When you hover over it, it says Responsive mode. Click on it to select a new option.
NOTE To learn more about the mobile responsive features of Elementor, check out these two articles from their documentation, where they discuss the feature in more depth.
Previewing, Saving and Publishing your Page
Once you have customized all the sections to your liking. You’re ready to preview, save and publish. You will find the buttons in the Elemetor panel at the bottom right.
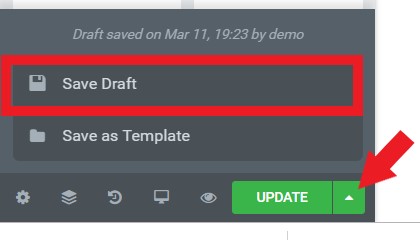
When you are publishing for the first time, the button will read as Publish. After you have published a page, if you want to change something, do so, then make sure to click Update.