.png)
Create a Deal from Launch Control to Pebble
In this article, you will learn how to push a contact or a lead from Launch Control (a mass texting software) into your Pebble deal boards immediately.
In this article:
- Setting up a Trigger
- Connect Zapier to Launch Control
- Testing the Connection of Launch Control to Zapier.
- Mapping the Information into Pebble
- Testing the action
- Bringing the conversation from Launch Control to Pebble deal notes
- Creating a deal by adding a contact and a property from Launch Control
- Publishing your zap
In order to do this, you will need to use Zapier (premium account) to access Webhooks (by Zapier), Launch Control (a mass texting software) account, and, of course, your Pebble account.
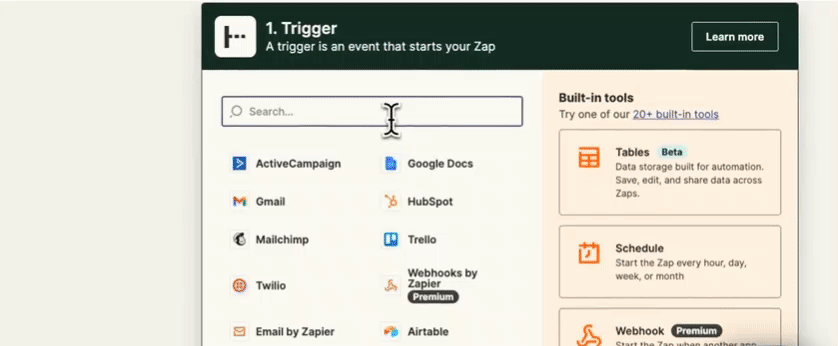
Setting up a Trigger
First, you need to set up a trigger by creating a zap in Zapier. Choose the trigger app Webhooks by Zapier to an event, which is Catch Hook, and hit Continue twice. A webhook URL will appear.
Copy the webhook URL and bring it to Launch Control.
Connect Zapier to Launch Control
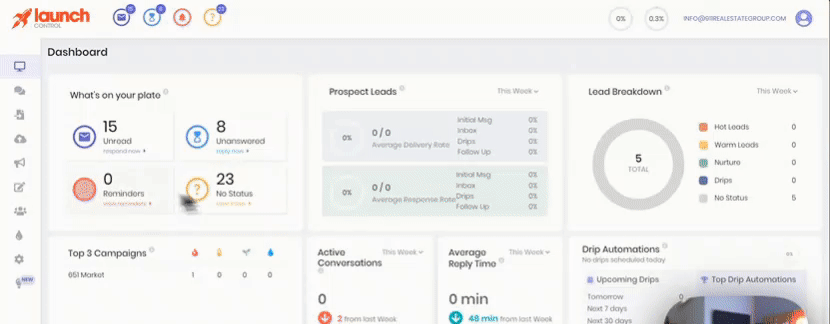
After creating a zap, log in to your Launch Control account. The dashboard will pop up. Navigate to Settings on the left sidebar menu, and click Integrations. On the right side panel, you will see Zapier, click Connect, otherwise, click Edit. Paste the Zapier Webhook URL, and hit Save.
Testing the Connection of Launch Control to Zapier.
After connecting Launch Control and Zapier, test the connection.
In order to test the connection, make sure to verify the phone number, and push to CRM. To do that, navigate to the Launch Control main panel, go to Inbox, and select any of the items inside the Inbox on the right side panel. Hit Verify and click Push to CRM.
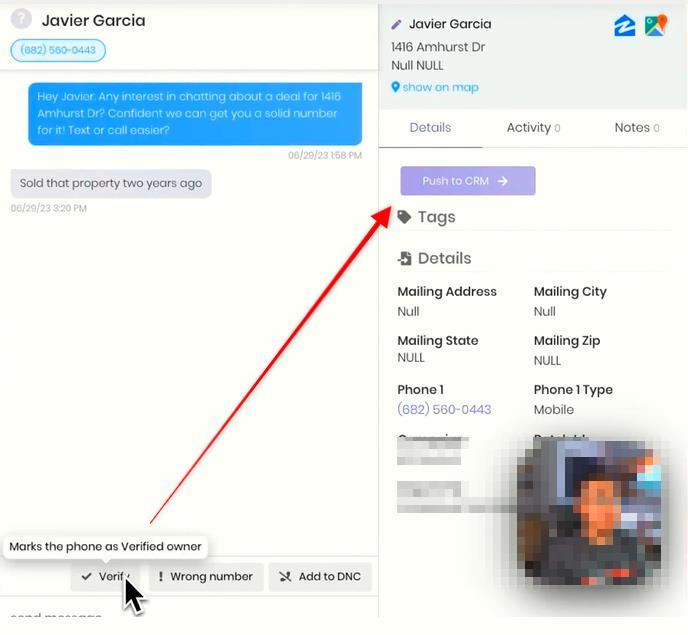
Ensure that the phone number is verified and the Push to CRM button is clicked in order to push the lead or prospect to Pebble.
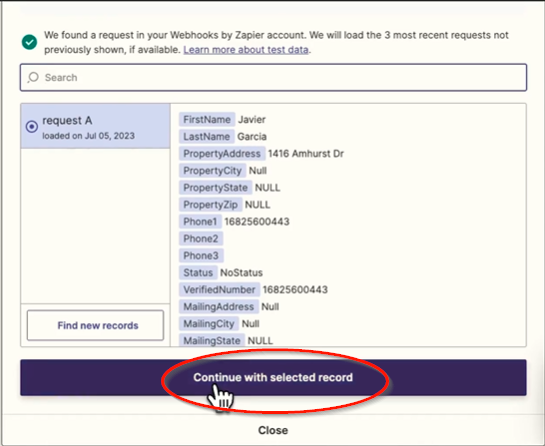
Now, return to Zapier, and hit the Test Trigger button. The system will pull the information from Launch Control into Zapier.

Mapping the information into Pebble
After testing the trigger and Launch Control pulling the information into Zapier, it is now time to map the information into Pebble.
To do that, hit the Continue with the selected record button.
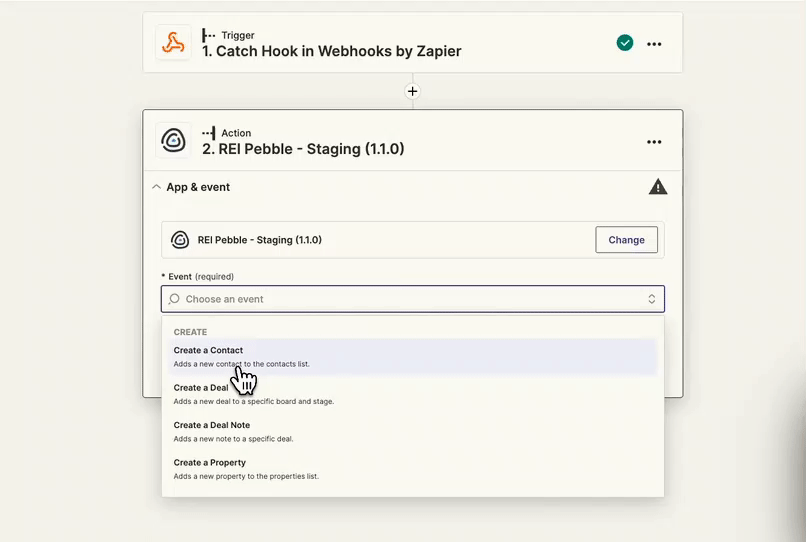
Type in Pebble (always select the latest version), select the event, for example, Create a Deal, and hit Continue.
There are four events in Pebble that you can choose from, these are:
- Create a Contact
- Create a Deal
- Create a Deal Note
- Create a Property
Choose an account. The system will ask you to log in to your Pebble account if haven't done so. Hit Continue.
Map the information by clicking the dropdown arrow and selecting the appropriate information. Note: Make sure to fill out all the required fields. Hit Continue. The system will display the mapped information from Pebble.

Testing the action
Let's check if the information from Launch Control was pushed to Pebble and created a deal card (this is the event selected from Pebble). Hit the Test Action button.
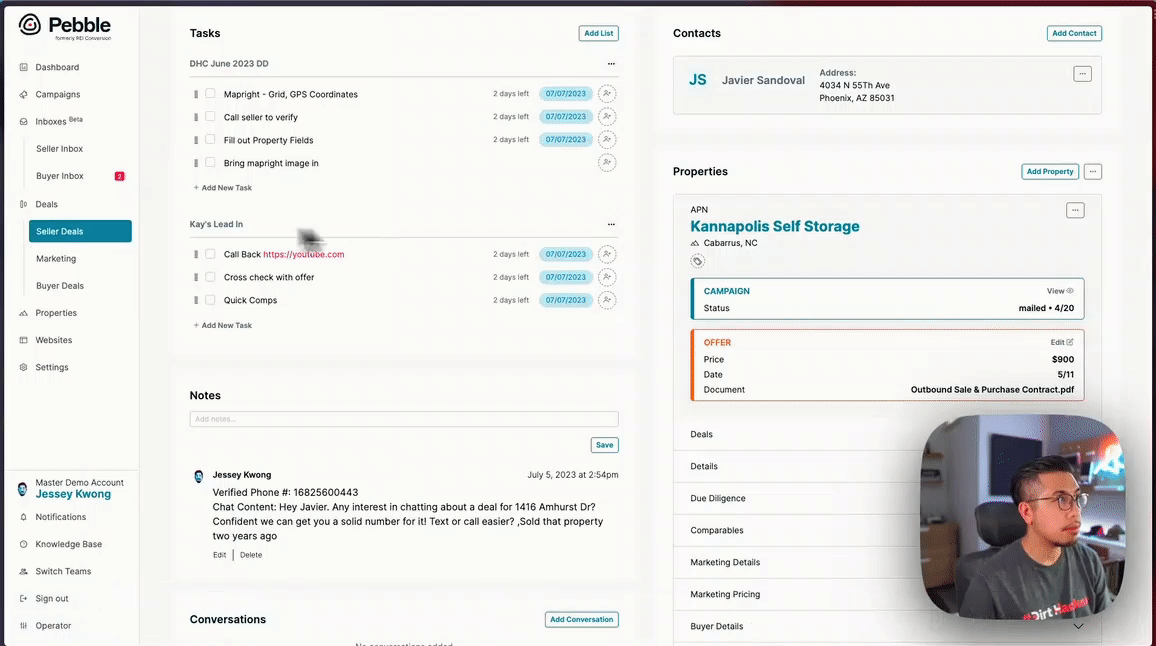
To see the test result, go back to Pebble, inside the Seller Deals > Lead In stage, scroll down, and check if a new lead is created based on the pulled-in information from Launch Control.

Bringing the conversation from Launch Control to Pebble deal notes
Once the test result has been successful, you may want to bring the conversation from Launch Control and push it over to Pebble deal notes.
To do this, go back to Zapier. Create another step by clicking the + icon. Select Pebble (app) and choose the Create a Deal Note event. Hit Continue. Select the account and hit Continue.

Take action by mapping the required information from Launch Control to Pebble. Hit the Continue and Test Action buttons.
Now, to check if the test action has been successful, return to Pebble and refresh the page.
Navigate to Seller Deals > Lead In stage. Scroll down and open the newly created lead. Go to the Notes section on the right-side panel and check if the pulled-out notes from Launch Control have been added to the created lead.
Creating a deal by adding a contact and a property from Launch Control
After having successfully created a lead from Launch Control, you can now add contact and add a property into Pebble. All you need to do is, click the Add Contact button in the Contacts section and select the contact details.
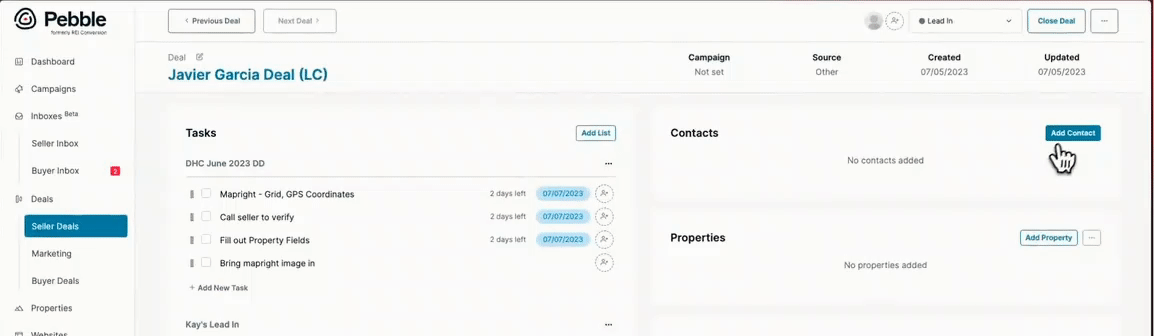
To add the deal's property, click the Add Property button in the Properties section. Type the name of the deal or check the message information (APN might have been provided) and then select that property.
Congratulations! You have successfully created a deal card from Launch Control!
Publishing your zap
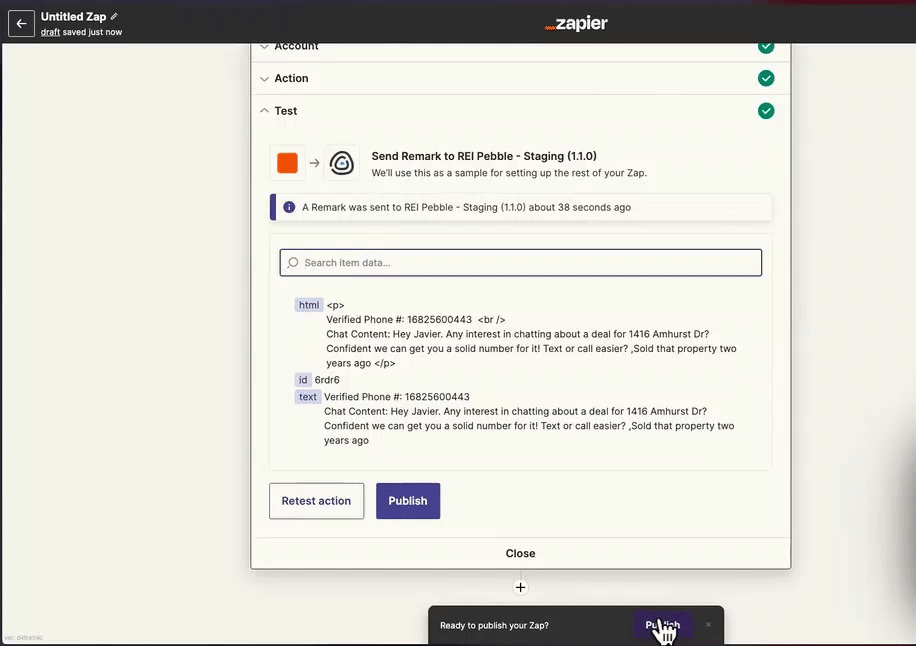
After testing the automation, you may not want to go back from scratch and repeat the steps all over. Make sure to publish your zap.
Go back to Zapier, name your Zap, and hit that Publish button. That's it!
To check the success of the automation you created, all you need to do is go to Launch Control, select an item from the Inbox, and hit the Verify and Push to CRM buttons.

Go back to Pebble, and refresh the page. Navigate to Seller Deals > Leads In, and scroll down to check the newly created deal.
Enjoy the automation!